You’ve come to the correct spot if you’re dealing with a Blink camera not working. We are here for troubleshooting Blink together, whether the issue is a recalcitrant connection or a jerky live view. In this article, I’m going to help you tackle issues with your Blink camera so you can get your security system back on track.
To deal with a Blink camera not working, make sure that the power source is working appropriately and the Wi-Fi connection is stable. If the issue persists, update the Blink app and your camera’s firmware and make sure the latest version is installed. If you’re dealing with motion detection or night vision difficulties, check the settings through app (the motion sensitivity must be checked and you must ensure that the system is armed; for night vision to work appropriately, clean the lens and make sure that the environment triggers the night vision mode. If the problem isn’t solved, go for a reset for both the camera and the Sync module.
Common Issues with Blink Cameras
Blink cameras are a mainstay of home security because of their user-friendliness and extensive coverage. But much like any technology, they might have problems. The following are some typical issues you may encounter:
- Power Problems: Power supply disruptions or low battery life may cause your camera to malfunction. Ensuring your gadget is always sufficiently charged is essential.
- Connectivity Problems: Poor Wi-Fi reception or issues with the Sync Module might cause connectivity issues that impair the functionality of your camera.
- Firmware and Software Issues: Incompatible software from outdated versions might result in cameras not working properly.
- Hardware Issues with Cameras: Occasionally, the camera itself may be the issue, either due to internal flaws or external damage.
The initial stage of troubleshooting is to determine the root problem. OK, so now it’s time to go through the solutions for eliminating these issues.
How to Deal with a Blink Camera Not Working Step-by-Step
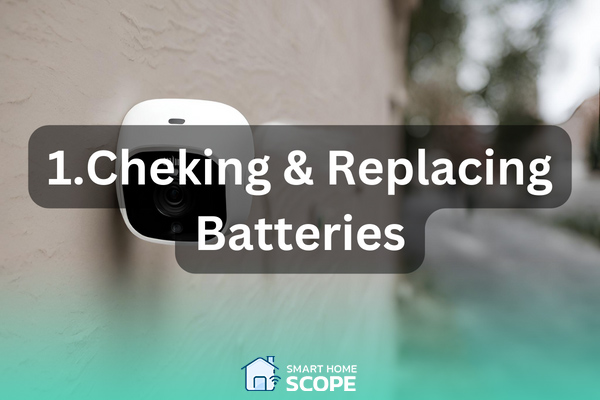
1. Blink Camera not Working: Checking and Replacing Batteries
The Achilles’ heel of Blink cameras often lies in the vexing issue of battery performance, a frequent harbinger of malfunction.
Problems with the batteries in a Blink camera are among the most frequent causes of their malfunction. Although Blink cameras are made to function well on batteries, they ultimately require replacement, just like any other battery-operated equipment. Here’s how to be sure the batteries in your Blink camera aren’t the problem:
- Check Battery Level: Start by using the Blink app to check the battery level. A new battery is needed if the indicator shows low battery life.
- Use the Correct Batteries: AA Lithium batteries are needed for Blink cameras. Performance problems may arise from using batteries that are not advised, such as alkaline or rechargeable ones.
- Proper Installation: It’s crucial to make sure the battery is installed correctly. If you position your batteries improperly, you may face power issues. Batteries should always have their positive (+) and negative (-) ends matched to the appropriate symbols in the container. Batteries that are misaligned or inverted cause power flow disruptions, rendering the camera inoperable. For best results, use batteries that are brand-new and completely charged. Checking the batteries is always an easy way to make sure your camera is functioning smoothly.
- Battery Contacts: If you see any buildup or rust, clean the battery contacts with a dry cloth to guarantee the connection between the batteries and your camera.
- Environmental Factors: Remember that prolonged periods of high or low temperature will shorten battery life. If your camera is situated in an area where there are frequent fluctuations in temperature, you might want to move it or provide it with some sort of temperature control.
Changing the batteries in your Blink camera is an easy and efficient way to fix it. This is often all that’s needed to restore your camera to its alert state.
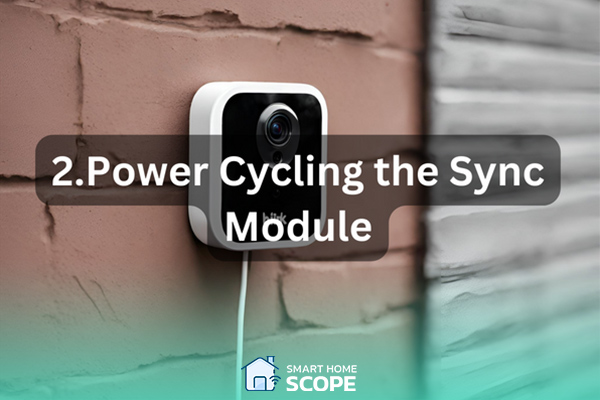
2. Blink Camera not Working: Power Cycling the Sync Module
One simple yet efficient technique to troubleshoot Blink cameras fix connectivity or functionality problems with your Blink camera is to power cycle the Sync Module. Refreshing the system connection does not change any data or settings. This is how you do it:
- Disconnect the Sync Module: To begin, disconnect the Sync Module’s power supply. This is the little gadget that facilitates communication between your Wi-Fi network and your Blink cameras.
- Hold on: Once disconnected, give it ten to fifteen seconds. During this little time, the gadget can completely shut down and get rid of any short-term issues.
- Reconnect: Re-plug the power supply into the Sync Module. When the module is turned back up and re-established a connection with your network, keep an eye out for the light on it.
- Examine your cameras: Use the app to verify your Blink cameras when the Sync Module is back online. Automatic reconnections to the Sync Module should occur. If connectivity was the problem, it should now be resolved for your cameras.
Many times, problems with camera identification, connection, and system responsiveness can be resolved with a straightforward reset. Additional troubleshooting could be required if issues still exist after the Sync Module has been powered off.
3. Blink Camera not Working: Checking the LED Indicator Light
Your Blink camera’s LED indicator light provides a clear way to see its current state and any problems it may be having. Learning about what each indicator light means can help you a lot in dealing with the Blink camera not working issue. The following is how to decipher these signals:
- Solid Green: When the camera is solid green, it usually indicates that it is powered on and operating as intended. If everything appears to be in order, but you’re still having problems, there might be an issue with your Wi-Fi connection or app settings.
- Blinking Blue: This signifies that the camera is establishing a network connection. Make sure the Sync Module is online and examine your Wi-Fi settings if it keeps blinking without connecting.
- Solid Red: An outage of electricity is frequently indicated by a solid red light. This may be the result of poorly placed batteries, a depleted battery, or, in the case of wired devices, a malfunctioning power source. Make sure the batteries are placed and charged appropriately, and that your power supply is dependable.
- Blinking Red: If the LED becomes red, there are problems with communication with the camera. A weak Wi-Fi connection or a range issue between the camera and the Sync Module might be the cause of this. In addition to thinking about wiping your Wi-Fi router, try relocating the camera closer to the Sync Module or router.
You may rapidly detect and fix a lot of common problems with your Blink camera by being aware of and responsive to these LED signals, frequently without the need for additional troubleshooting.
Also Read:
Blink camera not recording to USB
4. Blink Camera not Working: Improving Wi-Fi Connectivity
To maximize the prowess of your Blink camera, a steadfast Wi-Fi connection is paramount.
For the best possible performance out of your Blink camera, Wi-Fi connectivity is essential. Problems such as sporadic live views, delayed alerts, or cameras going down might be caused by weak or inconsistent connectivity. Here are ways to improve your Blink system’s Wi-Fi connectivity:
- Check the Wi-Fi Signal Strength: To find out the signal strength in the region where your Blink camera is located, use a Wi-Fi analyzer app. You may need to relocate your router closer to the camera if the signals are weak, or vice versa.
- Reduce Wi-Fi Interference: Your Wi-Fi signal may be interfered with by other electrical devices including Bluetooth speakers, cordless phones, and microwaves. Reduce the number of gadgets that are in the way of your router and the Sync Module or Blink camera.
- Update the Firmware on Your Network: Maintaining the most recent firmware on your network is crucial for both security and functionality, just like with your Blink system. To stay informed, check out the manufacturer’s website for any news on your router.
- Use a Wi-Fi extender: If changing the router or camera is not an option, a Wi-Fi extender may strengthen the signal in far-off parts of your house, guaranteeing your Blink cameras will always have a steady connection.
- Optimize Your Network’s Settings: Depending on whether your camera supports it, you may be able to increase communication by adjusting the channel on your network or moving from a 2.4 GHz band to a 5 GHz band.
- Restart Your Router: Restarting your router regularly will help it run more smoothly and remove issues. After unplugging it and waiting for around 30 seconds, re-plug it.
Your Blink cameras may function much better with improved Wi-Fi connectivity, giving your house dependable security coverage.
5. Blink Camera not Working: Updating the Blink App and Camera Firmware
For the best performance and security, make sure your camera firmware and Blink app are up to date. New features and bug fixes are mostly brought to customers by updates. This is how you keep things up to date:
- Update the Blink App: • For iOS Users: Search for the Blink app under the “Updates” category after opening the App Store. Tap “Update” next to the app to see if there is an update available. • For Android Users: To access the menu on an Android device, open the Google Play Store, press the three horizontal lines, and choose “My apps & games.” Locate the Blink app, then select “Update” if it is offered.
- Update Camera Firmware: • Blink cameras often automatically receive firmware upgrades. You can track the progress of these updates through the Blink app. If there is a firmware update available, you should be able to view it when you go to the camera settings. To finish the update, adhere to the instructions displayed on the screen.
- Ensure Constant Power Throughout Updates: • During the update process, confirm that your camera is powered on (if wired) or has new batteries (if battery-operated). Interruptions may result in firmware damage or, less frequently, partial upgrades.
- Check for Updates Frequently: • Even though most updates are automated, it’s crucial to make sure you don’t miss out on any significant enhancements. To keep up with the upkeep of your Blink system, set a monthly reminder to check for firmware and app upgrades.
Updating the firmware on your cameras and the Blink app is a big step in keeping your home security system safe and dependable.
6. Blink Camera not Working: Adjusting Camera Settings
Your Blink camera’s settings may be adjusted to fix problems with motion detection, video quality, and notification frequency. To do this, open the Blink app and go to the settings of each camera to make the required changes. Here’s a basic strategy:
Motion Detection Issues
Failure to detect motion is a typical problem with Blink cameras. This problem may not necessarily be connected to the detection mechanism itself, but rather to notification settings. To guarantee your camera recognizes movement and notifies you:
- Arm Your System: To arm your system, use the Blink app. If the system is disarmed, no notifications will be sent by the camera. To verify that the system is armed, look for the “Armed” button in the app; it should be blue.
- Turn on Motion Detection: Make sure the Motion Detection setting in the Blink app is activated. Look for the blue running man indicator, which denotes the presence of motion detection. To turn on motion detection, press the gray symbol.
- Modify Motion Sensitivity: Motion Settings are in the Camera Settings section of the Blink app. Here, you may modify the “Motion Sensitivity” slider to suit your preferences by moving it between “Low” (L) and “High” (H). While low sensitivity lessens alerts from inconsequential movements, high sensitivity enhances the possibility of detecting tiny motions.
- Verify Notification Settings: Make sure your notification preferences are set up properly. You won’t get motion alerts if the Snooze Notifications function is turned on (shown by a bell icon with a “Zs” over it). To get alerts, make sure this function is disabled.
- Test Motion Detection: Move in front of the camera to test motion detection after modifying the settings. Consider lowering the sensitivity even more or looking for any physical impediments that could prevent it from detecting motion if it still doesn’t work.
Addressing Live View Issues
Issues with a live view can be especially annoying as they make it difficult for you to keep an eye on your house in real time. If your Blink camera isn’t working properly in live view, try making the following changes:
- Ensure a Stable Internet Connection: To use live view, you must have a strong Wi-Fi connection. Make sure the internet connection on your viewing device and camera is steady. You might not be able to use live view correctly if your internet is erratic.
- Restarting the Blink software and Camera: Restarting the Blink software on your tablet or smartphone will occasionally fix problems with live view. Furthermore, power cycling—that is, disconnecting and then putting it back in—can assist in restarting your Blink camera and resetting its network connection.
- Look for Firmware Updates: Issues with a live view may arise from outdated firmware on your Blink camera. Make sure the firmware on your camera is up to date using the Blink app. Updates to the firmware frequently provide repairs and enhancements that can improve the operation of the live view.
- Use a Compliant Device: Verify that the gadget you’re using to access the Blink app can display live views. Live view and other new app features might not work perfectly on some older smartphones.
Sometimes, users try to access the live view but encounter the error, the error announces that the Blink system is busy. This is probably due to Blink’s single device access, meaning that you can use the live view feature only on one device at a time, for more information, follow the link in this paragraph.
Video Quality
A common solution to poor video quality is to change the video settings. If your Wi-Fi connection is spotty, you might need to reduce the resolution; if bandwidth permits, you can raise it for crisper visuals.
Notification Settings
Changing the notification settings may assist if you’re not receiving any alerts at all or if you’re getting too many. You may change the alert frequency or create schedules to only get messages at particular times.
Troubleshooting Night Vision Issues
It’s essential to comprehend and resolve Night Vision problems with Blink cameras to continue conducting efficient monitoring in low light. When the night vision feature is operating properly, your camera will record clear video even in the dark. Here’s a methodical way to deal with typical night vision issues:
- Ensure Enough Darkness: Low light levels trigger the activation of night vision. Make sure there is adequate darkness in the area for this function to activate.
- Clean the IR sensors and lens: Good night vision depends on clarity. To get rid of any dirt or smudges, carefully wipe the infrared sensors and camera lens with a clean, dry cloth.
- Restart Your Camera: Technical issues impacting night vision can occasionally be fixed with a quick restart. You may power cycle your camera by unplugging and replugging its power supply.
- Inspect the electricity Source: Inadequate electricity or a low battery might affect the ability to see in the dark. Make sure there is enough electricity in your camera.
- Update Camera Firmware: Bug fixes and enhancements are frequently included in firmware updates. Ensure that the most recent firmware version is installed on your Blink camera.
- Modify Camera Position: Keep the camera away from bright lights or reflecting objects that might obstruct the activation of night vision.
- Contact care: It is advised to get in touch with Blink customer care for additional help if problems with night vision continue after trying these fixes.
Audio Settings
Depending on your requirements and tastes, you may change the speaker volume or microphone sensitivity on a Blink camera if it has audio capabilities.
7. Blink Camera not Working: Resetting the Camera and Sync Module
Should the trials with your Blink camera endure despite employing simpler troubleshooting methods, embarking upon a factory reset of both the camera and Sync Module may become imperative.
If the Blink camera problems persist after trying more basic troubleshooting techniques, a factory reset of the camera and Sync Module may be required. Resetting the devices to their initial settings might help resolve any glitches or problems. This is how to carry out a reset:
Resetting the Sync Module
- Find the Sync Module’s reset button on its side.
- Hold down the reset button with a paperclip or other such instrument for about five seconds. A successful reset will be indicated by the Sync Module light blinking red before turning to solid green.
- To reconnect the Sync Module to your network, go according to the directions provided in the Blink app.
Resetting the Camera
- If the camera is battery-operated, open the container and take the batteries out.
- Disconnect the power supply from any wired cameras.
- Hold off on replacing the batteries or turning the power back on for ten to fifteen seconds.
- Using a paperclip, press and hold the physical reset button on your camera (such as the Blink Mini) for ten to fifteen seconds, or until the LED light flashes red before becoming solid blue to signify a successful reset.
After the reset, the camera will have been deleted from your account, so make sure to add it to your Blink system using the app. To do this, take the following actions:
Re-Adding a Blink Camera to the App
- Tap the “+” symbol in the app to add a new device to re-add the camera.
- To re-add your camera to the system, adhere to the instructions displayed on the screen. This might entail manually inputting the camera’s serial number or scanning the QR code on the device.
Preventive Measures to Avoid Future Issues
Take into consideration doing the following preventive actions to make sure your Blink cameras keep functioning properly and to reduce the possibility of problems in the future:
- Frequent Updates: Make sure the firmware on your camera and Blink app are up to date. Manufacturers update their products often to enhance functionality and address recognized issues.
- Optimal Placement: To avoid performance issues, place your cameras away from intense heat sources and direct sunshine, as well as inside a strong Wi-Fi signal range.
- Appropriate Maintenance: To keep dust and debris from clogging the lens or sensors, clean your cameras regularly. Look for any nests or cobwebs that can obscure the image from outside cameras.
- Battery Monitoring: To prevent power outages, check your Blink app’s battery levels regularly and replace batteries as needed.
- Network Stability: Make sure the Wi-Fi network at your house is safe and steady. For optimal functionality, think about connecting your home security cameras to a separate Wi-Fi network.
You may greatly lower the likelihood of running into problems with your Blink cameras and continue to have home security coverage by taking these preventative steps.
Conclusion
Dealing with a Blink camera not working doesn’t have to be difficult. Troubleshooting Blink camera requires appropriate strategy and a little perseverance, with the right approach, you can return full functionality to your home security system. Keeping up with the latest updates is the key to avoid common issues, always keep that in mind. If you ever feel stuck don’t be afraid to contact Blink support for help.
FAQs
What is causing my Blink camera to miss activity during the night?
If your Blink camera has trouble detecting motion at night, make sure nothing is obstructing its view and check the camera’s night vision settings. Changing the Blink app’s motion sensitivity settings can also be beneficial.
What is the lifespan of a Blink camera’s batteries?
The kind, configuration, and use of the camera all affect battery life. When used regularly, Blink camera batteries may often last up to two years. To guarantee peak performance, check the app’s battery levels regularly.
