You can connect a Blink camera to enhance the overall security of your home. I am Erfan Askari, the founder of Smart Home Scope and in this article, I’ll tell you how you can set up a Blink camera step-by-step, I’ll also give you tips on enhancing your Blink camera setup so you can maximize the security of your home, so let’s go!
To connect Blink cameras in your home, follow these steps:
- Firstly, download the Blink app and create an account.
- Next, install the sync module.
- Then, add your Blink camera device to the Blink app using the QR code on the back of the device or its packaging.
- After that, mount the Blink camera and position it perfectly for a good view of your home.
- Then, tweak and customize the settings.
- Finally, test your Blink camera setup and troubleshoot any possible issues.
In this article, I will thoroughly explain each step mentioned above. Don’t worry if you’re confused; this is just the beginning, and we have a lot to cover!
Getting Started with Your Blink Camera
Starting with the Blink camera system, I set out to improve the security of my house. The camera, mounting hardware, batteries, and a Sync Module (for some versions) were all included in the box. To guarantee flawless connectivity, you must have a reliable Wi-Fi connection with an upload speed of at least 2 Mbps. To prevent any glitches during setup, I ensured that my internet could handle the work before moving further.
Unboxing and Understanding Your Blink Camera Components
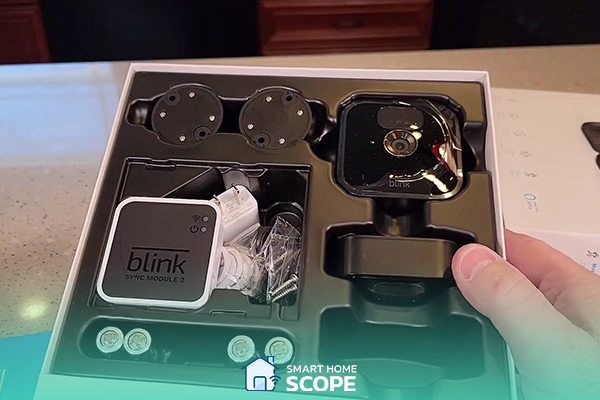
Of course the first step to connect Blink camera is unboxing it. There’s always excitement when new technology is unboxed. I discovered everything I needed, carefully packaged, within the Blink camera package. I first got to know each part, figured out why it was there, and ensured I had everything I needed. This first step is essential for the setup procedure to go smoothly.
Requirements for Blink Camera Setup
There are a few requirements before you can begin:
- A tablet or smartphone capable of running the Blink Home Monitor App.
- A Wi-Fi connection that meets the minimum upload speed requirement of 2 Mbps.
- The Blink Home Monitor app can be obtained via Google Play or the App Store.
Ensuring these prerequisites are satisfied expedites the setup procedure and makes it simple to activate your Blink camera. Blink is a great brand and the Alexa-compatibility of these cameras and doorbells streamlines your smart home experience, you can connect a Blink doorbell to Alexa, an outdoor camera, an indoor camera, and pretty much any product coming from Blink!
Connect Blink Camera: Setting Up the Blink Home Monitor App
My next task to connect Blink camera included configuring the Blink Home Monitor App, which acts as the camera’s control panel. This application is essential for setup as it allows you to adjust camera settings to view video and receive notifications for motion.
Downloading and Installing the App
Using my Android device, I first downloaded the Blink Home Monitor App from the Google Play Store. For those using iPhones, you can also locate the software in the Apple App Store. The application was installed and operational within minutes after a simple download.
Creating Your Blink Account
Setting up your Blink camera requires creating a Blink account, essential for managing your devices and accessing other services. I went through the account creation process as follows:
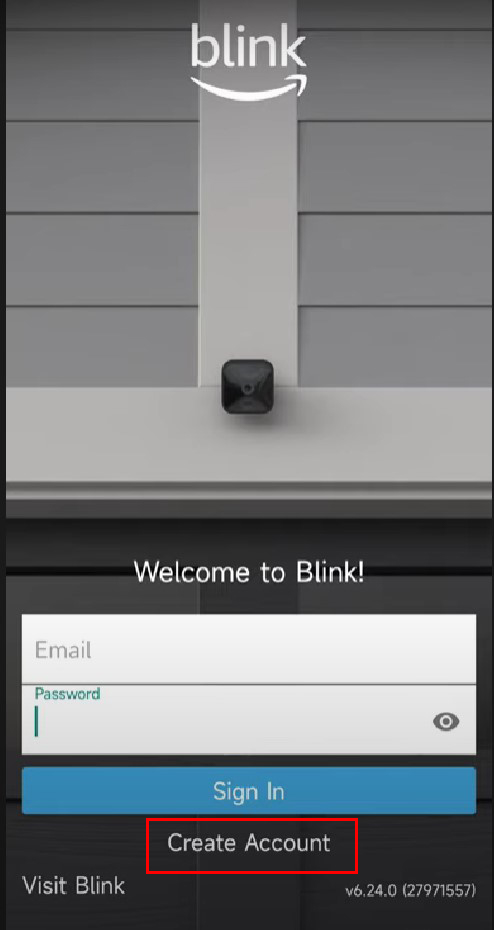
- Launch the App: When I first launched the Blink Home Monitor App after its installation, I was greeted with a page asking me to log in or create a new account. As I was unfamiliar with Blink, I clicked “Create Account”.
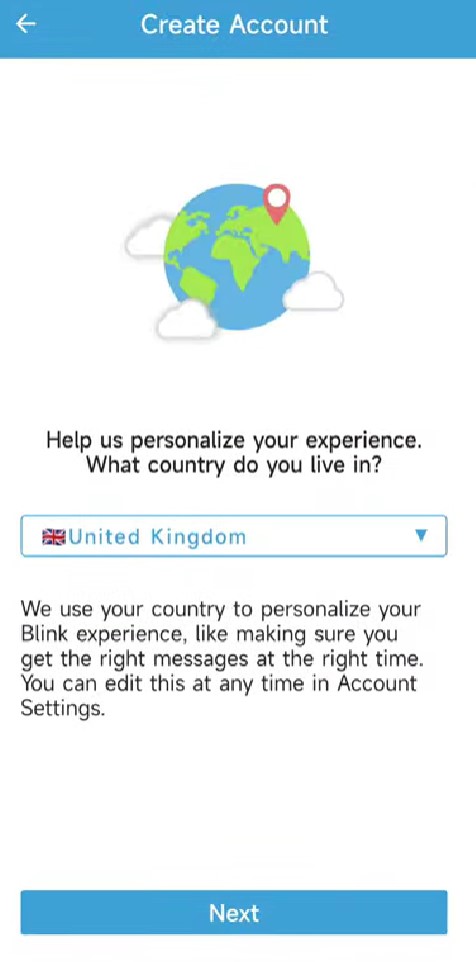
- Select Your Country and Region: I was prompted by the program to choose my nation and region from a selection of options. For the App to offer services and support that are region-specific, this step is essential. I selected my location and then hit “Next” to continue.
- Enter Your Email Address: After that, I was asked to provide my email address. It’s crucial to provide an email address you frequently check since Blink uses this address to deliver notifications and verification codes. I typed in my email and hit “Next.”

- Create a Password: I was prompted by the program to set a password for my account. I carefully used a strong password with a combination of letters, numbers, and special characters to protect my account.
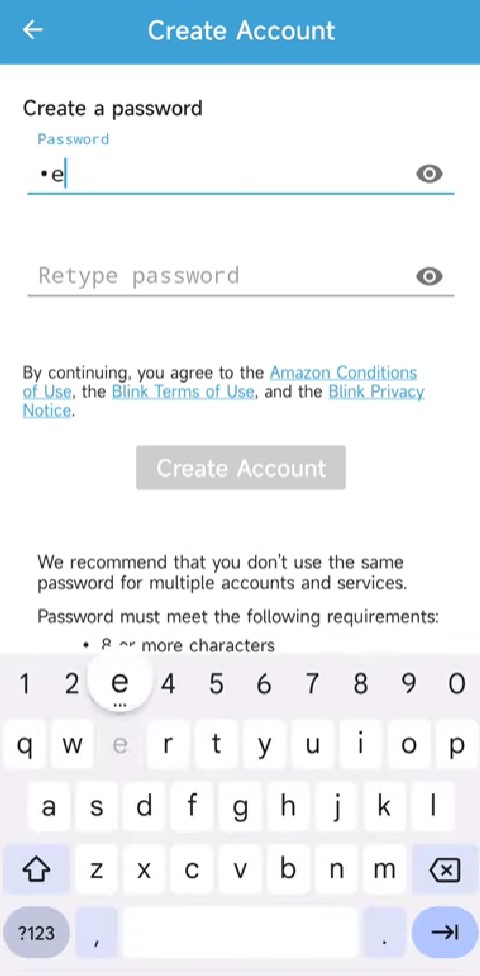
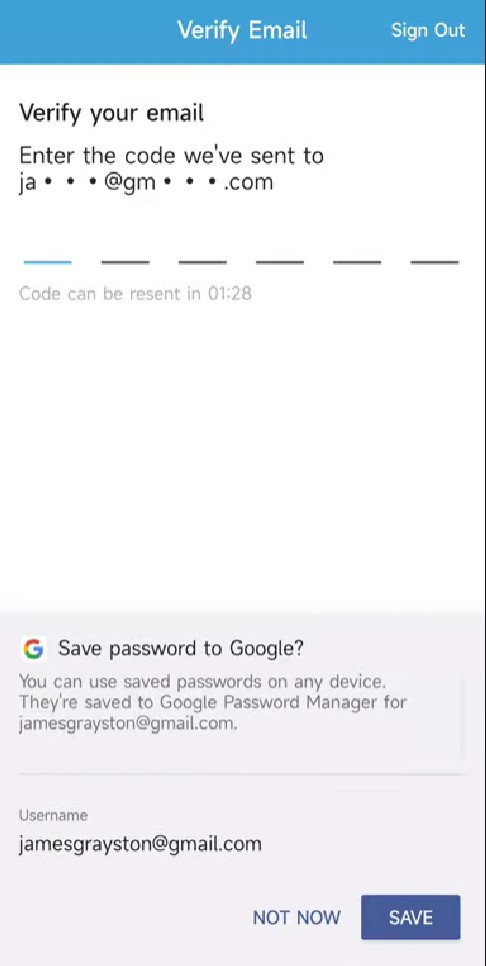
- Email Verification: After setting my password, I quickly got an email from Blink, including a verification number. I verified my email address on the App by entering this code again. Consider checking your trash or spam folder if you do not immediately notice the email.
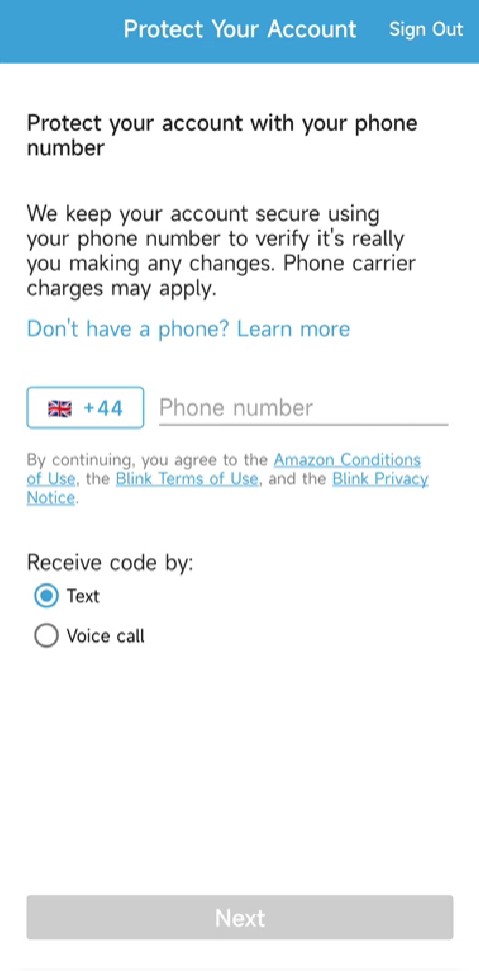
- Verify Your Phone Number: The software also requested that I confirm my phone number as an extra security measure. After entering my phone number, I soon got a text message with an additional verification code. My phone number was validated in the App after I entered this code.
- Linking to Amazon (Optional): I was allowed to connect my Blink account to my Amazon account in the last stage. While not necessary, doing this step is advised to access more features and integrations. I linked my accounts by following the instructions and inputting my Amazon login information.

I could create an account quickly and securely, knowing that only I could access my Blink system. After setting up my account, I was prepared to move on to the next installation phase.
Connect Blink Camera: Installing the Sync Module
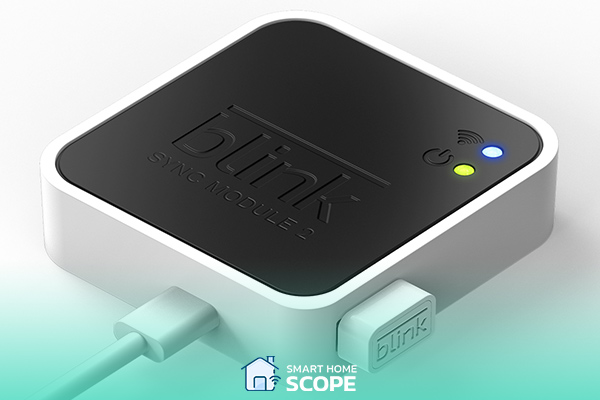
An essential part of the Blink camera system, the Sync Module connects your home Wi-Fi network and your Blink cameras. It ensures that your cameras maintain connectivity and effectively utilize their battery life. Here’s how I configured it:
What is the Sync Module and Why It’s Important?
Setting up the sync module is an important step when you want to connect Blink camera. I took the time to learn about the function of the Sync Module before getting started with the configuration. It’s a little gadget that plugs into your Wi-Fi network and helps your Blink cameras communicate with the Blink servers. By reducing the amount of Wi-Fi activity directly on the cameras, it improves the management of the cameras and increases the longevity of their batteries.
Connecting the Sync Module to Your Network
I took careful note of these instructions to integrate the Sync Module with my Blink system and ensure a smooth connection to my home network:
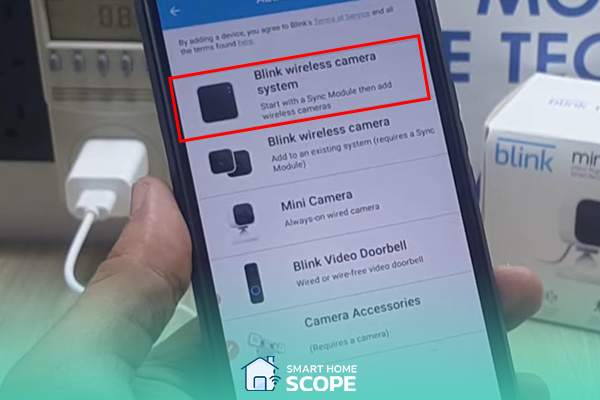
- Launching the Blink Home Monitor App: As soon as I accessed the App on my smartphone, I noticed the plus (+) symbol in the top-right corner of the home screen. If you find yourself on a different page, you can return to the main screen by tapping the home symbol in the bottom-left corner.
- Selecting the Device Type: I selected “Blink Wireless Camera System” from the list of choices. Making this decision is essential to accurately determine the kind of device you’re integrating into the Blink ecosystem.
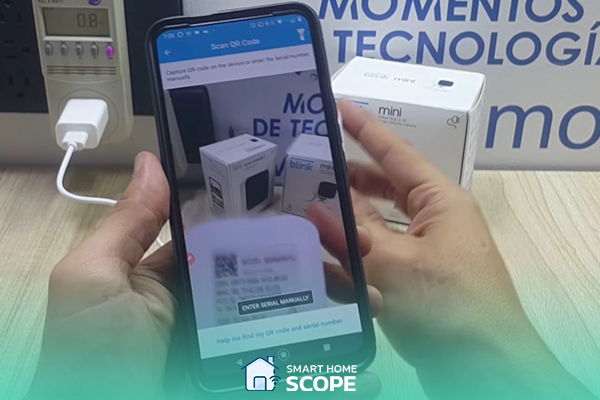
- Scanning the Sync Module’s QR Code: I was prompted by the App to scan the Sync Module’s rear QR code. The program also provides the convenience of “Enter Serial Manually” if the QR code is not readable. I located the device’s serial number on the top and manually input it.
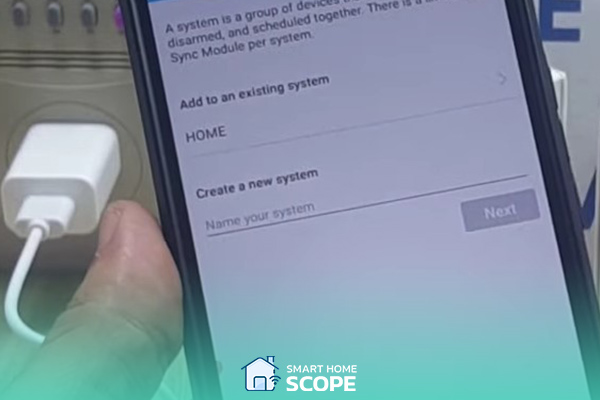
- Naming the Blink System: Once the QR code was recognized, I was asked to name my Blink system. This step is quite helpful for distinguishing between different configurations, such as “Home” and “Office.” After naming it, I proceeded by clicking “Next.”
- Powering the Sync Module: I used the included USB cable and converter to connect the Sync Module to a power source. The Sync Module’s larger USB-A connector is intended for optional video recording onto a thumb drive, while the micro-USB port powers the device.
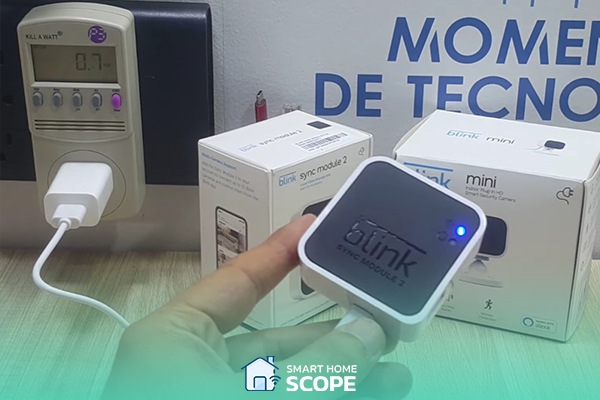
- Observing the Indicator Lights: I waited for the Sync Module’s indicator lights to illuminate appropriately after turning it on: the top light started blinking blue, indicating that the device was ready for the next phase, and the bottom light turned solid green. I was prepared to use a paperclip to press the reset button on the side of the Sync Module if the lights didn’t appear as expected.
- Device Discovery: I opened the App and selected “Discover Device,” which allows the Sync Module’s specific network (identified in the Wi-Fi settings as BLINK-XXXX) to start seeking for itself.
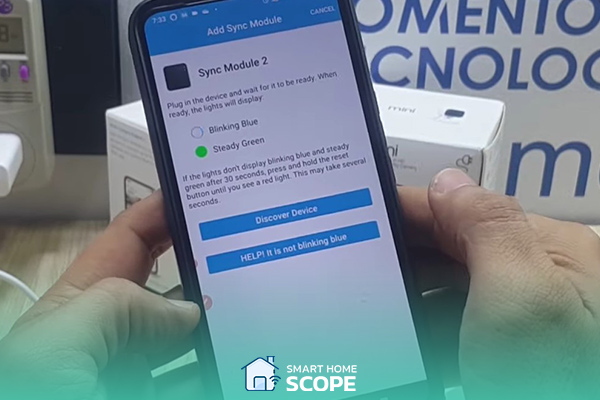
- Connecting to Wi-Fi: After clicking “Join,” my smartphone showed the Wi-Fi networks that were accessible. Tapping on “Join” allowed me to connect the Sync Module to my Wi-Fi after selecting my home network and entering the password.
- Waiting for Updates: The Sync Module updated its firmware, so the last step required some patience. It’s crucial to keep the device connected to the power source throughout this process to ensure a successful update.
- Completion: After the upgrade, I tapped “Done” on the App. The Sync Module’s successful connection to my home network indicates that it is now ready to communicate with Blink cameras, showing that the system has been seamlessly integrated.
Positioning Your Sync Module for Optimal Performance
It’s essential to position the Sync Module correctly. To ensure a solid connection, place it between your Wi-Fi router and the Blink cameras, ideally in the middle of the space. As the living room is the focal point of my layout, I placed mine on a shelf there to guarantee a strong connection between my network and the cameras.
Now that the Sync Module was configured and connected, my Blink system was prepared to accommodate the cameras. The Blink app’s detailed instructions made this process easier than I had expected.
Set Up Blink Camera: Adding Your Blink Camera to the App
The Sync Module needed to be successfully configured before I could connect my Blink camera to the system. Through this method, the camera and the Blink app can interact, allowing me to see live video, set up custom settings, and receive motion alerts. I accomplished it as follows:
- Preparing the Camera: I ensured the camera was prepared for use. This required charging the camera using the included AA batteries. The battery compartment of cameras such as the Blink XT2 and Blink Outdoor can be conveniently accessed from the device’s rear.
- Opening the Blink Home Monitor App: After the camera was turned on and ready, I returned to my smartphone’s Blink app. The app’s user-friendly layout made the following stage simple to navigate.
- Adding a New Camera: When I added the Sync Module, I tapped the plus (+) symbol in the top-right corner of the App’s home screen. This time, I chose “Add Blink camera” from the list of choices.
- Scanning the Camera’s QR Code: Every Blink camera has a unique QR code, often located on the back or inside the battery box. I used the Blink app on my smartphone to scan this QR code using the camera. It’s crucial to perform this step before attaching the camera if the QR code is located within the battery compartment.
- Connecting the Camera to the Sync Module: The App initiated linking the camera to the Sync Module automatically after scanning the QR code. This is a critical step since it connects the camera to my Blink system and enables communication between it and other Blink devices and the App.
- Naming the Camera: I was asked to name the camera as soon as the App detected it. Naming cameras helps you recognize them on the App, especially if several cameras are installed across your house. For ease of reference, I called it something that accurately indicated the camera’s location.
- Adjusting Camera Settings: After adding a camera to my Blink system, I changed several parameters using the App, such as the re-trigger time, video quality, and motion detection sensitivity. To get the most out of your battery life and camera performance, it’s important to adjust these settings.
- Finalizing the Setup: I hit “Done” to finish the camera setup after modifying the parameters to my liking. The camera was successfully installed on my system, as verified by the App, and I could watch live video from the camera right away.
Thanks to the Blink Home Monitor app’s explicit instructions, adding my Blink camera to the App was a simple procedure. Now that the camera was connected, I could mount it and arrange its location to get the best coverage.
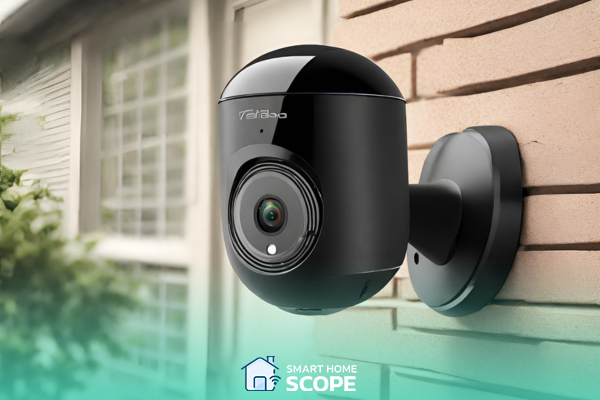
Connect Blink Camera: Mounting and Positioning Your Camera
Once my Blink camera had seamlessly integrated with the App, the subsequent crucial phase involved its strategic mounting and precise positioning. This step was vital to optimize motion detection capabilities and to expand the camera’s visual horizon to its fullest extent.
Here is the approach I adopted to accomplish this task:
Choosing the Right Location
I started by thinking about which sections of my house needed to be watched. I chose a location that would give me a good view of the main entrance because it is a crucial place for security. You need to find a balance between a place that protects your camera from harsh weather conditions and one that lets your camera capture key entry points and areas of interest.
Mounting Tips for Indoor and Outdoor Cameras
Here are some mounting tips to properly connect Blink cameras:
• Indoor Cameras: I searched for high vantage spots to get the best view of the space from my indoor arrangement. I made sure the camera was positioned away from direct sunlight to prevent glare in the video stream. With just a few screws, the mounting bracket for the Blink camera made it simple to install it on the wall.
• Outdoor Cameras: I ensured it was positioned behind an awning or other covering to protect the camera from the weather while installed outdoors. The camera positioning was done in a way that it does not activate unnecessary movements of objects like cars and swaying branches, while also considering its range and motion sensor performance.
Also Read:
Blink Continuous Recording
Adjusting the Camera for the Best View
After mounting it, I adjusted the camera’s angle and field of vision using the live view function of the Blink app. Ensuring that I covered the right region was a very important step to me. The attachment on the camera made it simple to modify, allowing me to obtain the ideal angle. I checked the camera several times during the day to ensure that illumination didn’t impact visibility.
Testing Motion Detection
I tested the motion detection settings by moving the camera around the monitored area once it was placed and positioned. This helped me adjust the camera’s sensitivity so that it would alert me to significant movements without being triggered by insignificant motions.
Thanks to the versatile mounting choices and the valuable instructions provided by the Blink app, installing and setting up the Blink camera was a simple task. Now that the camera was installed and configured to my liking, I felt more at ease knowing that my house was being adequately watched.
Now that we’ve discussed installing and configuring the Blink camera, let’s look at how to adjust the settings to meet our needs. This is one of the mandatory steps to increase the efficiency of the camera and get more out of your Blink system.
Customizing Your Blink Camera Settings
After downloading and connecting my Blink camera to the app, I experimented with the many options to customize the camera’s behavior to my tastes. Below is a summary of the primary configurations I changed:
Setting Up Motion Detection
The Blink camera’s motion detection function is one of its most potent capabilities. I needed to ensure it was sensitive enough to detect any activity to prevent false alarms from overwhelming it.
- Sensitivity: I played with the motion sensitivity slider to find the ideal balance in the app. I had to experiment with several sensitivity settings for a while until I was able to find a setting that reliably identified movement without triggering even the slightest motion, such as the swinging of a tree limb.
- Activity Zones: I was able to design activity zones inside the range of view of the cameras, enabling this capability. This made it possible for me to block out locations—like a busy roadway that my front yard camera can see—where activity is regular and not a cause for concern.
Adjusting Video Quality and Recording Length
Video quality and recording duration are essential parameters that impact the clarity of the footage and the amount of storage space it requires.
- Video Quality: I discovered that the best clarity was obtained when the quality was at its maximum, particularly for distinguishing details like faces or license plates. If you have a slow internet connection or insufficient storage, you should think twice before using this setting, as it necessitates more bandwidth and storage.
- Recording Length: You may adjust the duration of the camera’s recording following motion detection using the Blink app. Most of the time, setting mine to record for 10 seconds after detecting motion was adequate. This duration can suit individual needs and the region under observation.
Scheduling Arm/Disarm Times
Planning when the camera is armed (active) and disarmed (inactive) is helpful. During the day, when I’m generally around, I set my camera to disarm, and I arm it at night and while I’m not home. This preserves battery life and cuts down on pointless alerts.
- Scheduling: I used the app’s scheduling feature to establish precise periods for the camera to arm and disarm automatically. This function is handy when you want to stick to a schedule and don’t always want to remember to adjust the camera’s state manually.
By adjusting the Blink camera’s settings, I could maximize its functionality and ensure I was informed of significant occurrences while reducing false alarms and pointless recordings. As a result of these modifications, my Blink system is now an even more helpful home security tool.
Testing Your Blink Camera Setup
Testing your setup is the final step when you want to connect Blink cameras. Having tailored the Blink camera setup to my personal preferences, it was only prudent to proceed with a meticulous examination of its functionality. This critical juncture was indispensable for unearthing any underlying issues and refining the setup to its utmost efficacy.
I embarked on this detailed scrutiny with the following methodology:
Conducting a Live View Test
Examining the live view function, which enables in-the-moment monitoring via the Blink app, was the first test. I checked each camera’s live view to ensure the video feed was reliable and clear. Through this test, I verified that the cameras were properly connected to the network and that video quality settings matched my internet speeds as well as disk space sizes.
Testing Motion Alerts and Recording
I then focused on examining the motion detection function to ensure the cameras correctly identified motion and promptly notified users.
- Motion Detection Test: I strolled across the regions that each camera was capturing to activate motion alerts. This made it easier for me to confirm that the activity zones, if configured, were successfully blocking unnecessary movements and that the sensitivity settings were calibrated appropriately.
- Recording Test: I verified the cameras captured the incidents as planned by checking the app after setting off the motion. I had to assess the quality of a video and ensure it was recorded long enough, so I could get the necessary data from it.
Troubleshooting Common Issues
After you connect Blink cameras, some issues may start bothering you. While testing, I encountered a few problems, such as a camera that wasn’t recording as intended and a delay in receiving motion alerts. This is how I addressed them:
- Improving Wi-Fi Connectivity: I noticed that a lower Wi-Fi signal impacted the performance of one camera. I relocated my Wi-Fi router to ensure a robust signal across my house and considered purchasing a Wi-Fi extender.
- Adjusting Settings: I reviewed the Blink app’s settings for the camera that wasn’t consistently recording. I discovered the problem was fixed when I checked the camera’s battery level and adjusted the motion sensitivity.
- Firmware Updates: For optimum performance, ensure the camera firmware and the Blink app are up-to-date. I made sure that I had updated the software by checking for updates, thus making it more useful.
Testing my Blink camera configuration was a crucial step to ensure my home security system was functional and suited to my needs. It offered me comfort knowing that my house was being properly watched over and instilled faith in the dependability of my Blink cameras.
Enhancing Your Blink Camera System
Once I had set up and extensively tested my Blink camera system, I investigated methods to improve its coverage and usefulness. Blink’s features and accessories are meant to increase the system’s effectiveness and versatility in meeting various home security needs. This is how I went about improving my Blink configuration:
Adding Additional Cameras
I considered adding more Blink cameras to cover areas I had not previously monitored to ensure full coverage. By adding more cameras, I could expand the area I monitored, as the installation procedure was the same as installing the first one.
- Strategic Placement: I inspected my house to identify any blind spots or areas that could benefit from additional surveillance, such as the rear or side entrances. These areas now have cameras, which has strengthened the security system.
Exploring Blink Accessories
The following accessories are available from Blink to improve and enhance the camera system:
- Mounts: To ensure optimal positioning and angle for each camera, I explored various mounting options. Blink offers mounts with positional freedom to maximize the field of vision and motion detection capabilities.
- Solar Panel Charger: To sustain the power of outdoor cameras without changing their batteries, I thought about installing a solar panel charger. This is very useful, especially for those cameras that are hard to reach.
- Blink Floodlight: Enhanced lighting for improved nighttime video quality and acting as a deterrent to potential burglars make Blink Floodlight an excellent addition to exterior cameras.
Integrating with Amazon Alexa
Being an Amazon subsidiary, Blink’s cameras offer convenient voice control features by seamlessly integrating with Alexa. I connected my Blink system to my Alexa-enabled devices to use voice commands to arm and disarm the system or view live feeds on Echo Show devices.
Regular Maintenance and Firmware Updates
After you connect Blink cameras, it is important to take care of them. I committed to performing routine maintenance on my Blink camera system to ensure its long-term dependability and functionality, which included:
- Battery Replacement: To guarantee uninterrupted functioning, monitor battery levels via the Blink app and replace them as necessary.
- Software Updates: To take advantage of the newest features and security improvements, regularly update the camera firmware and Blink app.
Enhancing my Blink camera setup gave me peace of mind, as I knew that my house was being safeguarded and monitored by trustworthy technology that could increase the overall security of my home. Blink, my home security system, has become more powerful and effective with all these upgrades and connections.
Conclusion
Now that you know how to connect Blink camera, you can easily increase the overall security of your home thanks to your Blink camera setup. Now with the cameras installed, you can rest easier knowing your property is always being monitored. When you set up Blink camera in your home, you truly realize the modernity of technology and its ability to strengthen security in your home.
FAQs
Does each Blink camera require a Sync Module?
It is usually unnecessary to have a separate Sync Module for every camera as one Sync Module can accommodate several cameras.
Do I need an internet connection to utilize Blink cameras?
Most capabilities require an internet connection; however, local video storage may be achieved using Sync Module 2 and a USB drive.
How can I extend my Blink camera’s battery life?
To prolong battery life, consider modifying motion detection settings, reducing video quality, and ensuring the camera is positioned correctly.
What should I do if I don’t receive motion alerts from my Blink camera?
Verify the motion settings, ensure the camera and Sync Module firmware are up-to-date, and, if needed, consider resetting the camera.
