


")
Comparing Hubitat vs. Home Assistant and choosing the right smart home hub is crucial, especially if you wish to have a real “smart home” with robust automation. Otherwise, you’ll just end up with some connected devices. These hubs offer local control over Zigbee, Z-Wave, and Wi-Fi devices, making them awesome choices, but which is right for you? Let’s find out!
Which One is Better, Hubitat or Home Assistant? (Quick Answer!)
If you’re not into technical complexities and want a stable, low-maintenance smart home, Hubitat is a great choice. It comes with built-in Zigbee and Z-Wave radios, so there’s no need for extra hardware or setup software. However, if you rely heavily on Wi-Fi or Bluetooth devices, you may run into compatibility issues.
On the other hand, Home Assistant is perfect for those who enjoy tinkering and setting up multi-layered automations. In addition to Z-Wave and Zigbee, it supports Wi-Fi and Bluetooth devices, making it ideal for diverse ecosystems.
While Home Assistant offers better compatibility, customization, and automation, it comes with a steep learning curve. Choose Home Assistant only if you’re comfortable reading community forums, performing regular maintenance, and experimenting with integrations.
The table below provides a quick comparison of Hubitat vs. Home Assistant at a glance:
| Feature | Hubitat | Home Assistant |
|---|---|---|
| Ease of Use | ✅ Beginner-friendly | ❌ Requires technical knowledge |
| Automation Options | ✅ Simple rule-based system | ✅ Advanced scripting with YAML & Node-RED |
| Device Compatibility | ⚠️ Zigbee & Z-Wave only (limited Wi-Fi support) | ✅ Works with almost everything |
| Customization | ❌ Limited | ✅ Fully customizable |
| Dashboard & UI | ⚠️ Basic, manual setup required | ✅ Stunning, fully customizable |
| Remote Access | ⚠️ Limited (requires $2.99/month for full access) | ✅ Free (if manually configured) or $6.50/month (Home Assistant Cloud) |
| Official Support | ✅ Yes | ❌ No (community-driven) |
| Community & Third-Party Integrations | ⚠️ Small but helpful | ✅ Massive and highly active |
| Reliability | ✅ More stable over time | ⚠️ Requires occasional troubleshooting |
What Are Hubitat and Home Assistant?
Let’s familiarize ourselves with these two smart hubs in general and learn about their unique strengths and characteristics.
What is Hubitat?
Hubitat prides itself on offering local control over automations without relying on cloud services. Z-Wave and Zigbee radios are built into the hub, which allows it to control a wide range of smart devices.
Unlike Google Home and Amazon Alexa, which depend on the internet, Hubitat ensures everything works fine even when the internet is down. Here are the key points to consider when choosing Hubitat as your hub for smart home automation:
- Plug-and-play functionality: Unlike Home Assistant, which requires additional hardware like a Raspberry Pi to function, Hubitat is easy to use; just plug it in, and that’s it.
- Privacy-focused: Local control ensures smart home security and data privacy.
- Easy automation: Creating automated harmony between smart devices can’t be easier with Hubitat thanks to its Rule Machine.
- Limited Flexibility: Compatibility with devices isn’t as robust as what you can achieve with Home Assistant.
What is Home Assistant?
Home Assistant is an open-source home automation platform that’s well-known for its high level of customization. You unlock a world of possibilities with this hub. However, it requires self-hosting on a device like a Raspberry Pi, a NAS, or a dedicated server.
While you can do anything with Home Assistant, and I mean ANYTHING, you should consider that there’s a steeper learning curve that’s unpleasant for newcomers and those who wouldn’t like to be technically involved too much. Here are key points for Home Assistant:
- Highly customizable: With YAML scripting and custom dashboards, you can do, as I said, ANYTHING!
- Wide device compatibility: Works with Zigbee, Z-Wave, Bluetooth, MQTT, and more.
- Cloud-optional: Similar to Hubitat, you can work with the internet, but it can also be used without it.
- Steep learning curve: If you have zero technical knowledge, Home Assistant will cause you headaches!
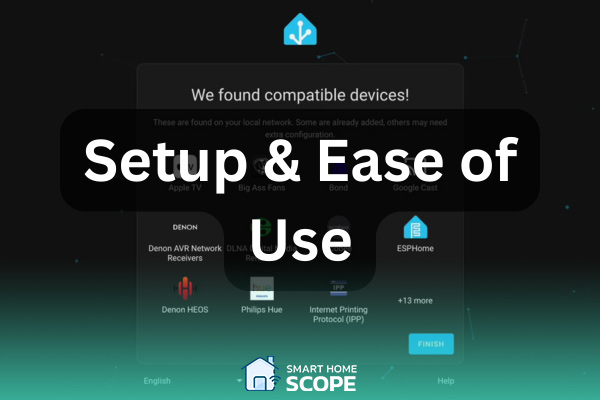
Hubitat vs Home Assistant: Setup and Ease of Use
If I had told you for a million years how important ease of installation is when setting up a smart home, it still wouldn’t be enough! A system that’s hard to configure or requires constant troubleshooting isn’t what you’d want to invest in. Let’s compare Home Assistant vs. Hubitat to see which excels in this area.
Setting Up Hubitat: Plug & Play Simplicity
If you’re hunting for the easiest smart hubs to buy, consider the Hubitat Elevation series, including C5, C7, and C8 series (I suggest you read my Hubitat C7 vs. C8, by the way). The process is as easy as:
- Plugging it in: Just connect the power adapter and Ethernet cable.
- Creating an account: Sign up on Hubitat’s web interface.
- Discovering devices: The hub looks for Zigbee and Z-Wave devices automatically.
- Setting up automations: Use the nice and easy Rule Machine to set up your automations.
It took me about 15-20 minutes to get my Hubitat C8 up and running. However, the dashboard setup looks a bit clunky. Unlike Home Assistant, which generates a control panel automatically, Hubitat requires you to add an “app” before you can even create a dashboard. This extra step, while not difficult, seems unnecessary.
Anyway, I love the fact that Hubitat runs locally. You don’t get the culprits and slow response times with an internet connection. All automation works instantly without delays.
Setting Up Home Assistant: More Power, More Work
On the other hand, we have Home Assistant, which offers much more control than Hubitat but isn’t as simple. Here’s what you need to do:
- Choose your hardware: Install Home Assistant on a Raspberry Pi, a NAS, or a mini PC.
- Flash the OS: Download Home Assistant OS and flash it into an SD card or SSD.
- Boot and access interface: Connect to Home Assistant using a web browser.
- Add integrations manually: Here’s the tricky part; unlike Hubitat, Home Assistant doesn’t have built-in Zigbee or Z-Wave integration, meaning you’ll need USB dongles.
- Set up automations: There are many ways to create your routines. You can use blueprints, YAML, or Node-RED.
The setup process was way longer than Hubitat’s. It took me about an hour and a half, and that’s without troubleshooting! If you’re unfamiliar with things like Docker, YAML, or MQTT, trust me, there will be a learning curve.
Although setting up Home Assistant was frustrating, the level of customization it provided blew me away. Home Assistant automatically detected most of my devices, including my Nest thermostat, Philips Hue lights, Broadlink IR blaster, and so on.
Which One is Easier to Use?
| Feature | Hubitat | Home Assistant |
|---|---|---|
| Installation Time | ~15 minutes | ~1 hour |
| Technical Knowledge Needed | Minimal | Moderate to Advanced |
| Automatic Device Discovery | No | Yes |
| Built-in Zigbee & Z-Wave | Yes | No (requires separate dongles) |
| Automation Complexity | Simple rule-based system | Advanced scripting options |
If you just want to set up automations that work smoothly without making you troubleshoot them constantly or go through a technical journey, choose Hubitat. However, if you want full control with a high level of customization, Home Assistant is the right choice for you.
When comparing Hubitat’s ease of use to Home Assistant’s, Hubitat beckons those craving effortless automation, while Home Assistant entices tinkerers with boundless customization.

Cost and Hardware Requirements
You don’t want to invest in Hubitat or Home Assistant only to realize you’re going broke afterwards! So, it’s important to consider the upfront cost and long-term expenses. Let’s see how Hubitat and Home Assistant stack up here.
Hubitat: A One-Time Purchase with No Hidden Costs
There aren’t any hidden costs with Hubitat. You just buy the hub, plug it in, and you’re good to go. There’s no extra hardware or mandatory subscriptions. My Hubitat C8, one of the most recent models, costs around $150-$170, depending on promotions.
✅ What’s included?
- Built-in Zigbee and Z-Wave radios (no need to buy extra dongles)
- Local automation engine (no need for external servers)
- Free remote access (no need for subscriptions to access the cloud)
❌ Potential Extra Costs
- You’ll need to pay $3 per month for cloud backups for Hubitat Protect.
- Hubitat works with Wi-Fi and cloud-based devices, but some integrations, like Nest, require community workarounds.
Also Read:
Hidden Costs of Alexa
Also Read: Hidden Costs of Alexa
When I bought my Hubitat, I didn’t need to get anything else. My IKEA Zigbee bulbs, Aqaramotion sensors, and Z-Wave locks all worked with Hubitat from day one.
Home Assistant: Customization Comes at a Price
While Home Assistant is free software, users need additional hardware to make it work. I went with a Raspberry Pi 4, but there are more options out there:
| Hardware Option | Approximate Cost | Pros | Cons |
|---|---|---|---|
| Raspberry Pi 4 (4GB) | $60–$90 | Low power usage, widely supported | Hard to find, can overheat |
| Mini PC (Intel NUC, etc.) | $150–$400 | Powerful, long-term stable | Higher initial cost |
| Home Assistant Green (Official Device) | $99 | Plug and play, pre-configured | Limited availability |
In addition, you need to buy some more stuff for your Home Assistant to function, including Zigbee and Z-Wave dongles ($40-$100) and an SSD ($50) to increase speed and longevity. There’s also an optional cloud access that costs $6 per month if you want Alexa or Google Assistant integration without manual setup.
Cost Comparison: Home Assistant vs. Hubitat
| Cost Factor | Hubitat | Home Assistant |
|---|---|---|
| Upfront Cost | $150–$170 (one-time) | $60–$400 (varies by setup) |
| Zigbee & Z-Wave Support | Built-in | Requires additional dongles (~$40–$100) |
| Remote Access | Free | Free (manual setup) or $6.50/month |
| Ease of Setup | Plug-and-play | Requires hardware and installation |
| Long-Term Cost | Minimal (no required subscription) | Higher (if upgrading hardware or using cloud access) |
Which One Offers Better Value for Money, Hubitat or Home Assistant?
Hubitat is the better choice when it comes to value for money, especially if you’re not into technical procedures or deeply customized setups; it’s just a one-time purchase with minimal effort.
Automation Capabilities
If you want a real “smart” home, you must set up automations. Otherwise, you’ll just end up with a bunch of connected devices. This is where smart hubs become important. An effective hub allows you to control devices based on time, sensors, or complex conditions.
Both Hubitat and Home Assistant are great in terms of automation, but they take very different approaches.
Hubitat: Simple and Powerful Rule-Based Automation
Thanks to Hubitat’s friendly and easy Rule Mahine, I was able to create if-this-then-that style automations without needing to code. There’s a visual interface that lets you set the rules, and no coding is required.
✅ What makes Hubitat’s automation great?
- Easy rule creation: Create rules and automations with a visual interface that frees you from coding.
- Local execution: No internet access is needed; all automations work instantly.
- Device triggers: Automate devices based on motion sensors, door sensors, schedules, or button presses.
- Conditional logic: With if-then-else conditions, you can create more complex automations.
🔹 Example: Simple Automation in Hubitat
I set up the lights in my living room to turn on at sunset. Using Rule Machine, it took me less than a minute to implement this.
The example above seems so basic, I agree. However, Hubitat also allows for advanced automation. For example, I have a motion sensor in the hallway that:
- Turns on the lights at 20% brightness after 10 PM.
- Increases brightness at 100% if motion continues for 30 seconds.
- Turns off 5 minutes after no motion is detected.
Hubitat is indeed a powerful automation tool, even for those who don’t know how to write code.
Home Assistant: The King of Customization
While Hubitat is impressive for its ease of use, Home Assistant is a beast for limitless automation possibilities. There are many ways to create automations in Home Assistant:
- Automation UI: This one’s a visual builder, something like Hubitat’s Rule Machine.
- YAML scripting: Advanced users who want complete control can use this one.
- Node RED: A drag-and-drop logic system for complex automations.
🔹 Example: Advanced Automation with Home Assistant
Here’s one of my favorite automations with Home Assistant in my climate control system:
- If my indoor temperature sensor detects over 78°F, Home Assistant checks the outdoor temperature.
- If the outside temperature is cooler and the system detects that I’m inside using geofencing, my smart fan turns on, and my windows open (via Zemismart Zigbee Window Opener).
This multi-layered automation is impossible (or very hard) to implement with Hubitat’s Rule Machine.
Automation Comparison
| Feature | Hubitat | Home Assistant |
|---|---|---|
| Ease of Automation | Beginner-friendly | Steeper learning curve |
| Prebuilt Automation UI | Yes (Rule Machine) | Yes |
| Scripting Support | No coding required | YAML and Node-RED options |
| Advanced Conditions | Yes, but limited | Unlimited logic and scripting |
| Local Execution | Yes | Yes |
Who’s the Winner for Automation?
It really depends. If you’re willing to go through all that trouble to create sophisticated automations (or maybe you love it!), choose Home Assistant. On the other hand, for those who prefer simple, effective automations, Hubitat is better.
Home Assistant suits avid tinkerers, while Hubitat excels in effortless, reliable automation.
Home Assistant vs. Hubitat: Compatibility with Smart Home Devices
Your smart hub should support a wide range of devices, such as smart bulbs, sensors, switches, thermostats, and locks, to function as a real “hub.” Both Home Assistant and Hubitat support major smart home protocols, but their approaches are different.
Hubitat: Seamless Zigbee & Z-Wave, Limited Wi-Fi Support
As I told you earlier, Hubitat benefits users with built-in Z-Wave and Zigbee radios. This means you won’t need additional hardware to make Hubitat work with these two protocols.
✅ What Hubitat supports natively:
- Zigbee devices (Philips Hue, IKEA Tradfri, Aqara, Sengled)
- Z-Wave devices (Zooz, Aeotec, Schlage Locks, Fibaro)
- Some LAN/Wi-Fi integrations (Lutron, Sonos, Hue Bridge, Kasa MyQ)
- New: Apple HomeKit support (Officially supported on Hubitat Elevation hubs, including C5, C7, C8 and C8 Pro)
❌ Where Hubitat falls short:
- No native Bluetooth support (unlike Home Assistant).
- Limited Tuya/Smart Life integration (Many budget Wi-Fi devices don’t work).
Most of my devices (Aqara motion sensors, Schlage Connect smart lock, and IKEA smart bulbs) work on Z-Wave and Zigbee, so Hubitat worked great with my main setup. However, when I tried to add my Broadlink IR blaster, I ran into some issues due to the lack of native support.
Home Assistant: The Ultimate Compatibility King
On the other hand, we have Home Assistant that can connect to almost anything. However, the downside of a more complicated setup still remains.
✅ What Home Assistant supports natively:
- Zigbee and Z-Wave (but you need USB dongles like the Conbee II or Aeotec Z-Stick to make that happen).
- Wi-Fi and cloud services (Tuya, Shelly, Kasa Nest, Wyze, Ecobee, MyQ, and more).
- Bluetooth devices: (SwitchBot, Xiaomi sensors, Govee smart thermostats).
- IR blasters & RF devices (Broadlink, Bond, Logitech Harmony).
- Apple HomeKit (Natively works with a HomeKit Bridge).
- Custom integrations (via HACS or MQTT).
❌ Where Home Assistant falls short:
- It requires extra hardware (The need for Zigbee and Z-Wave dongles means extra costs and steps).
- Some integrations require cloud access (e.g., MyQ garage door).
When I first set up my Home Assistant, the number of Wi-Fi and Bluetooth devices it automatically discovered was crazy; it detected my Broadlink RM4, SwitchBot curtain motos, and even my PlayStation 5! They all showed up on the dashboard without a fuss.
However, I had to get Zigbee/Z-Wave USB dongles and manually add devices which complicated the setup process.
Device Compatibility Comparison
| Device Type | Hubitat | Home Assistant |
|---|---|---|
| Zigbee | ✅ Built-in | ✅ Requires USB dongle |
| Z-Wave | ✅ Built-in | ✅ Requires USB dongle |
| Wi-Fi Devices (Kasa, Tuya, Shelly, etc.) | ⚠️ Limited | ✅ Extensive support |
| Bluetooth Devices (SwitchBot, Govee, etc.) | ❌ No support | ✅ Native support |
| Infrared (IR) Blasters (Broadlink, Logitech Harmony) | ❌ No support | ✅ Works with integrations |
| Apple HomeKit Support | ❌ No official support | ✅ Full HomeKit bridge available |
Which One Wins the Compatibility Race Hubitat or Home Assistant?
If you’re mainly focused on Z-Wave and Zigbee protocols in your smart home setup, then go with Hubitat because it works fine and has built-in compatibility with these radios. However, if you’re like me and have devices like IR blasters and Tuya Wi-Fi devices in your setup, Home Assistant should be your choice.
For Z-Wave and Zigbee-centric setups, Hubitat is your ally. For a more eclectic array of devices, like IR blasters and Tuya Wi-Fi, Home Assistant is your canvas
Hubitat vs Home Assistant: Reliability and Maintenance
If you don’t want your lights to suddenly turn off, your automations to fail randomly, or other issues popping up, it’s important to ensure your smart hub is reliable enough to prevent such problems.
Hubitat: Reliable, But with Some Quirks
Hubitat is well-known for its stability, and that’s the main reason Hubitat caught my attention in the first place. Everything runs locally, and there’s no need for internet; once set up, it just works, and firmware is updated automatically. However, there were some issues along the way that are worth mentioning:
❌ Common Hubitat reliability issues:
- Slowdowns over time: After a few months of using Hubitat, I experienced slowdowns. Rebooting the hub once a week helps, though.
- Limited device logging: Troubleshooting will be very frustrating if an automation fails.
- Some Zigbee devices randomly drop: Some Aqara sensors just kept dropping; I fixed the issue with Zigbee repeaters.
The overall performance of Hubitat is stable, but occasional slowdowns and Zigbee issues mean it’s not perfect.
Home Assistant: Powerful But Requires Attention
While Home Assistant is extremely powerful, it’s not a “set-it-and-forget-it system”! For those who love to dive deep into automation and have some creative ideas regarding their home automation, I say it’s awesome, but if you want something that never needs maintenance, Home Assistant isn’t a good choice.
✅ What Makes Home Assistant reliable?
- Fast Performance: Pair it with a strong enough system (like an Intel NUC or Raspberry Pi with an SSD), and you’ll see how smoothly it runs.
- Frequent updates: Every month, new features and bug fixes are released.
- Extensive logging: Troubleshooting devices is way easier than Hubitat, thanks to extensive logging.
❌ Where Home Assistant struggles with reliability:
- Updates can break things: Home Assistant’s regular updates are a double-edged sword; sometimes, when a new update is released, it causes integrations to stop working.
- Requires occasional reboots: If you run Home Assistant on a Raspberry Pi, memory leaks can cause slowdowns over time.
- Automation complexity: If you implement YAML-based automation, with a small formatting mistake, your automations break.
In short, Home Assistant requires constant maintenance. You need to monitor it and keep it updated. But it can be incredibly powerful and reliable if you’re willing to put in the effort.
Which One Wins the Reliability Race?
| Factor | Hubitat | Home Assistant |
|---|---|---|
| Internet Dependency | ❌ Not required | ❌ Not required |
| Software Updates | ✅ Automatic but optional | ✅ Frequent, can break things |
| Troubleshooting Tools | ❌ Limited | ✅ Extensive logging |
| Slowdowns Over Time | ⚠️ Sometimes (requires reboots) | ⚠️ Sometimes (depends on hardware) |
| Automation Stability | ✅ Reliable | ⚠️ Can break with updates |
Obviously, Hubitat is more reliable, especially for newcomers to the world of smart home automation. While Home Assistant offers much control, it also requires significant maintenance, making it hard for new users to manage.

Home Assistant vs Hubitat: Remote Access and Cloud Dependencies
Hubitat: Free, but Limited Remote Access
Hubitat is designed to work locally, so it doesn’t need the cloud to function, but if you want to control your devices while away from home, you’ve got three ways:
1. Hubitat Remote Access (Free, But Limited)
You can control devices remotely using the Hubitat Dashboard through its mobile app or a web browser, but this method only works for pre-configured devices, so you can’t access all hub settings.
2. Hubitat Remote Admin (Paid, Full Access)
For $2.99/month or $29.99/year, you can gain full access to all your hub features and settings remotely. With Remote Admin, you can Pair new devices, modify automation, adjust hub settings, and access the entire Hubitat interface from anywhere.
3. Bonus: Bypassing Remote Admin using a VPN
Those with more technical knowledge can bypass Remote Admin using a VPN like Tailscale, WireGuard, or OpenVPN) on their home network. This allows for remote control without paid subscriptions.
Alexa & Google Home Integration
You can integrate Hubitat with Alexa or Google Home for free, allowing you to control compatible devices remotely through their cloud services; this also enables voice control via Alexa or Google Assistant.
Home Assistant: Full Remote Access, But at a Cost
Home Assistant offers more options for remote access. However, you need some technical knowledge to make it happen:
Home Assistant Cloud (Paid, But Easy)
First, there’s Home Assistant Cloud, which is easy to use; you just log in, and it works. However, it’s a paid option ($6/month or $65/year) that enables remote access, Alexa, and Google Home integration.
Self-Hosted Remote Access (Free, But Very Technical)
The second way to get remote access is by setting up a DuckDNS domain, SSL certificates, and port forwarding. While this method works without a subscription, it is quite technical and, if not configured properly, could lead to security risks.
Using VPN Access
The third way is through VPN access. Some users set up VPNs like WireGuard to connect to their home network. This option is very secure, but there’s an extra step whenever you want to access Home Assistant remotely.
Remote Access Comparison
| Feature | Hubitat | Home Assistant |
|---|---|---|
| Basic Remote Control | ✅ Free (limited) | ✅ Free (manual setup required) |
| Full Remote Access | ❌ Requires $2.99/month subscription | ✅ Free (if manually configured) or $6.50/month (with Home Assistant Cloud) |
| Alexa & Google Home Integration | ✅ Free | ❌ Free (manual setup) or $6.50/month |
| Security & Privacy | ✅ Local-first, secure | ⚠️ Manual setup can pose security risks |
Conclusion
This was my comprehensive Hubitat vs. Home Assistant guide. Both of these hubs provide excellent local control through Z-Wave and Zigbee radios. The final choice depends on your own taste, knowledge, and needs; Hubitat is excellent when it comes to reliability and ease of use, while Home Assistant offers unmatched customization and compatibility.


