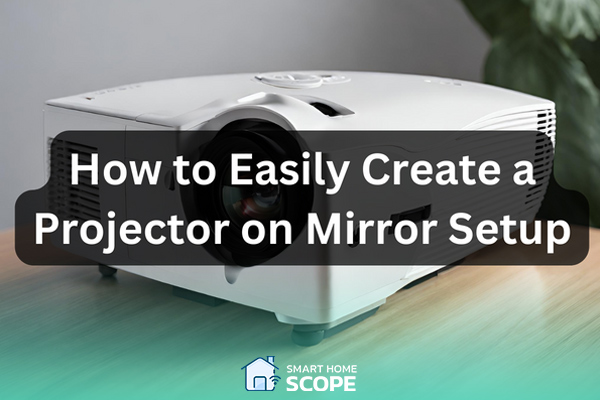
Using a projector on mirror is a concept that I’ve been exploring for some time. The feasibility and excitement of projecting images onto a mirror surface has captivated my attention in a way that I’ve deeply delved into it. The result that you achieve after the endeavors of casting images onto a mirror is indeed significant. In this article, I will guide you through configuring this unique setup and discovering the myriad possibilities that it holds.
How Can a Projector Work with a Mirror? Concise Answer!
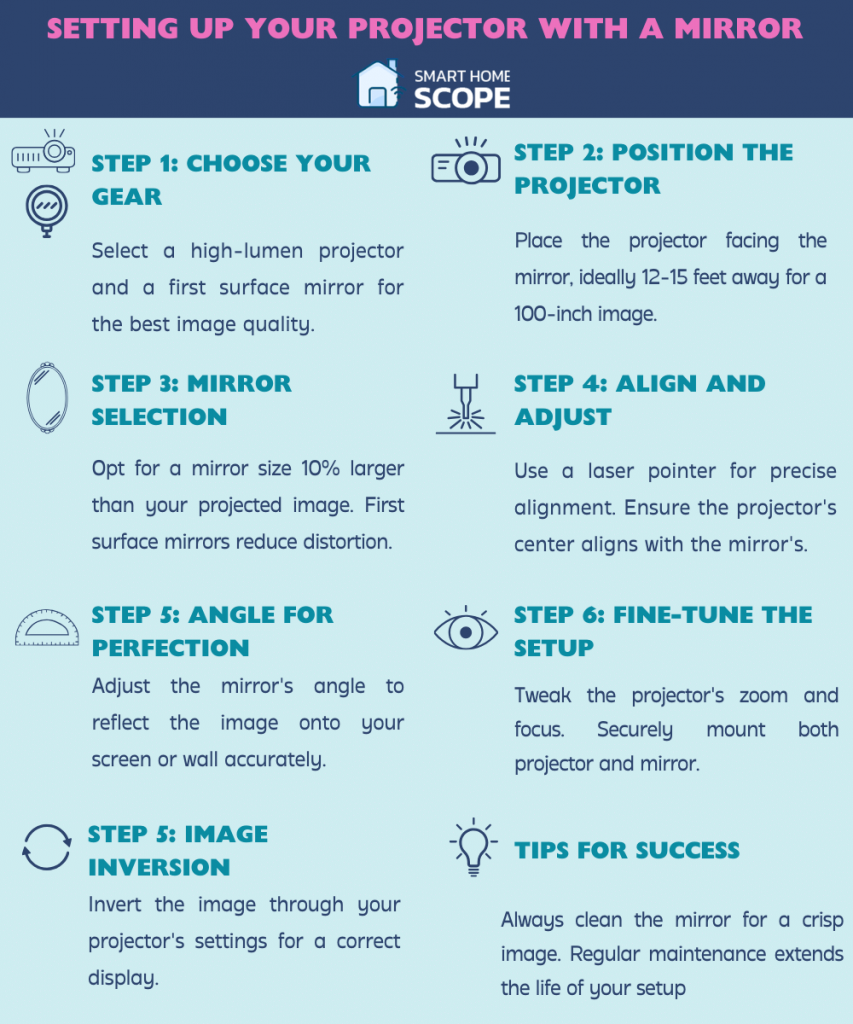
In order to have a robust projector on mirror setup, you must first provide a first surface mirror which can reduce distortion effectively. Position your projector in a way that it matches your desired image size (You can use the projector’s ration as a guide: throw distance/image width). Utilize a laser to precisely aim the projector at the center of the mirror. Finally, go to projectors settings and invert the device’s image, counteracting the mirror reversal effect. This infographic can be helpful:
The Basic Concept and Feasibility of Using Projector on Mirror
Understanding the Physics Behind Projecting onto a Mirror
Although the concept of projecting an image onto a mirror appears straightforward at first, there is an interesting interaction between physics that goes into it. An image can be seen on a secondary surface when a projector projects light onto a mirror, reflecting the image off the mirror’s surface. By almost doubling the projection distance, this method may provide a bigger image. I recall doing this in my little living room the first time around in an attempt to achieve a larger image for my movie evenings. The results were quite intriguing, although they did come with their share of challenges.
Real-world Examples and Applications of Projecting on Mirror
The fact that this idea isn’t only theoretical may surprise you. It’s applied in a variety of contexts. I once went to an eye doctor, for example, and his examining room was pretty small. They projected eye charts right opposite the examination chair using a projector-mirror system to make the most of the available area. It seemed like a good way to make use of the limited space and available technologies. It got me wondering about how this layout could work in small spaces.
Challenges and Solutions
Dealing with Light Reflection and Image Clarity
Light reflection was one of the first problems I ran across while playing around with projector and mirror configurations. At first, my projected images were blurry and bleached out. This is because not all mirrors are made equally for this usage. The reflecting coating on the mirror and its capacity to maintain the brightness of the projector light are crucial. I discovered via trial and error that the key to a clean image is to use a high-quality mirror with little distortion.
Choosing the Right Mirror for Projection
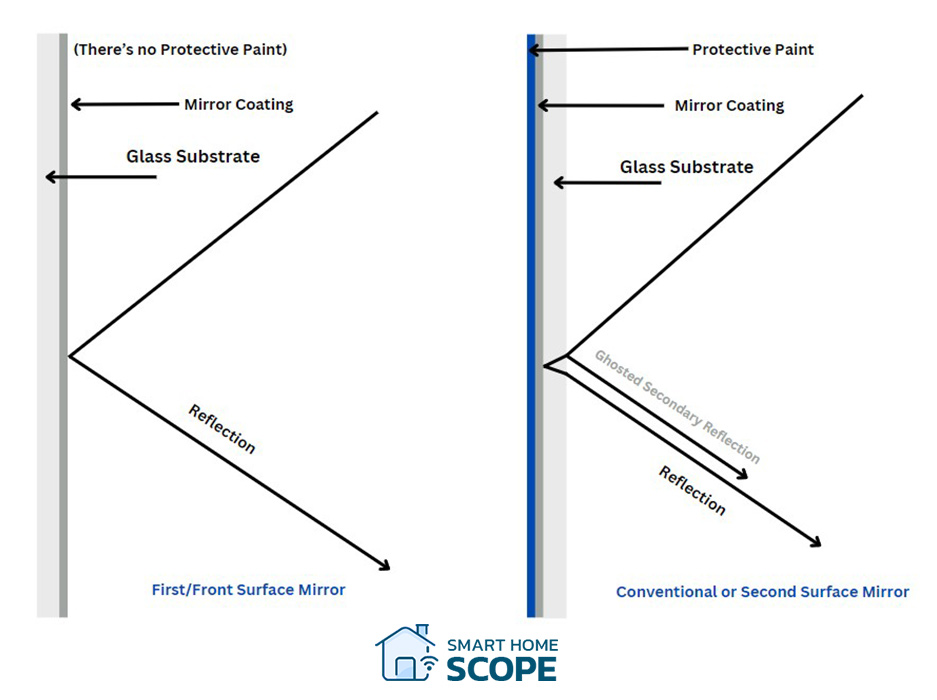
I’ve learned from my study and conversations on several tech sites that first surface mirrors work best for projection. First surface mirrors feature the reflecting coating on top, as opposed to normal mirrors, which have the coating underneath the glass. ‘Ghosting’ is removed, and the image becomes considerably crisper. It revolutionized my home theater system!
Understanding First Surface Mirrors
Often referred to as a front surface mirror, a front surface mirror is made with the reflecting coating immediately on the glass surface. This is not like a regular mirror, where the coating is put behind the glass to reflect light. In projection systems, a first surface mirror has a major advantage:
- Reduced Distortion: The image is clearer and less distorted since less light needs to go through the glass.
- No Ghosting: Light reflecting off the front and back surfaces of glass in regular mirrors can result in the appearance of a ghost image. Mirrors on the surface remove this problem.
It’s possible that first surface mirrors aren’t always identified as such while buying. Frequently discovered at specialized optical or photographic shops, they may be referred to as “optical mirrors,” “lab mirrors,” or “scientific mirrors.” To be sure you’re getting the appropriate kind, it’s crucial to ask for a mirror with a reflective coating on the face or the top of the glass.
Keep in mind that although first surface mirrors cost more, your projector setup will benefit from their capacity to deliver a precise and clean reflection.
Alignment and Setup Considerations
Achieving proper alignment is an additional crucial factor. It involves more than merely angling the mirror and projector. To prevent visual distortion, the angles and distances must be exact. To get the ideal alignment, I recall spending a whole weekend correcting the angles with the help of a laser pointer. Although it was somewhat of a challenge, every minute was well worth it when you solved it.
How to Use Projector on Mirror
Selecting the Right Projector and Mirror
The choice of projector and mirror is crucial for do-it-yourself setups. For crisp visuals, a projector with a high contrast ratio and good lumens for brightness is what you need. Regarding the mirror, a first-surface mirror is the best option, as I already stated. Although the price may be a little higher, the visual quality is simply unmatched. When I eventually found the ideal mirror—which I had looked for both online and in local stores—the image quality was noticeably better.
Step-by-Step Guide for Setup
It takes time and accuracy to set up your projector and mirror for the ideal viewing experience. Here is a thorough how-to to assist you with the procedure of using a projector on mirror:
Positioning the Projector
To begin, set up your projector. The specs of your projector and the desired picture size will determine the optimal distance to be from the mirror. For instance, you would need to position your projector 150 inches (12.5 feet) away from the mirror if you want a 100-inch diagonal picture and your throw ratio is 1.5.
Choosing the Right Mirror Size
The mirror has to be big enough to accommodate the whole projected picture. Assuming the diagonal size of your projected picture is 100 inches, make sure the width and height of your mirror can support this dimension. When choosing the size of your mirror, a decent rule of thumb is to add at least 10% to the projected image’s dimensions.
Aligning the Projector with the Mirror
Center the projector’s lens with the mirror’s center by using a laser pointer. This makes it easier to make sure the picture appears correctly on your wall or screen.
Adjusting the Mirror Angle
The angle of incidence and reflection are equal. Therefore, if the mirror is positioned at a 45-degree angle to your projector, adjust it so that the picture is reflected onto your screen at the same angle. For accurate adjustments, you may require a digital angle finder or an inclinometer.
Fine-tuning the Image
After completing the basic setup, adjust the image by turning on your projector. To make sure the image is clear, adjust the zoom and focus of your projector. To get the greatest image alignment, you might also need to gently modify the mirror’s tilt. You can also use a projection mirror software (explained in the advanced techniques and technologies section of the article) to further enhance your visuals.
Securing the Setup
After everything is precisely positioned, install the projector and mirror firmly. This prevents any unintentional movement that might cause your setup to become misaligned.
Inverting the Image
Lastly, locate the option to turn the image horizontally or invert it by going into your projector’s settings. This ensures that the image will look suitable when reflected in the mirror.
Never forget that patience and attention to detail are essential for a good setup. To ensure that you have the viewing experience it is important to spend an ample amount of time on each step.
Maintenance and Care for Longevity
Maintaining your configuration is necessary for long-term effectiveness. Keep your projector lens clear of dust and clean it regularly. Frequent cleaning of the mirror is required to prevent dust accumulation, which can degrade the quality of the image. To keep the mirror surface from being scratched, use a microfiber cloth and a mild cleanser. I make it a routine to clean my equipment every two weeks. This method has substantially aided in the preservation of image quality.
Innovative Uses and Creative Setups for Projector on Mirror
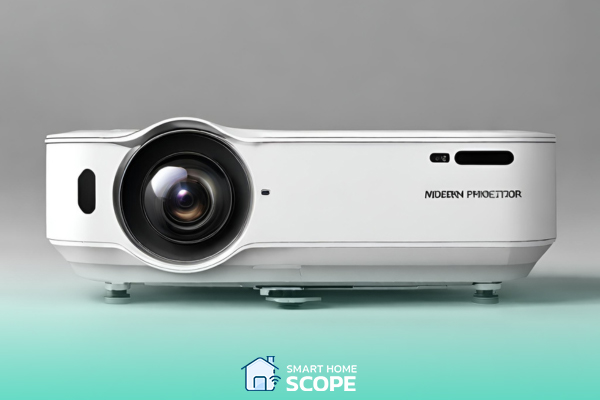
Enhancing the Home Theater Experience
Home theaters are among the most fascinating applications for this approach. You can produce an incredibly large image in a relatively small room by projecting it onto a mirror. My projector is positioned to bounce off a mirror, doubling the throw distance. This enables me to create a theater-like environment in my living room.
Professional Settings: Gyms and Doctor’s Offices
This configuration has practical uses in professional contexts besides being entertaining. Mirrors, for instance, can be used in gyms not only for exercise but also to display fitness lessons or inspirational videos. Similarly, as mentioned before, this setup proves beneficial in practices with compact spaces.
Art Installations and Creative Displays
This method comes into its own in the context of art installations. Artists can use strategically positioned mirrors to project images, creating captivating exhibitions. This can give the artwork the appearance of depth and motion, adding more movement. I’ve seen this method used in several amazing pieces, inspiring me to try it out in my artistic endeavors.
UST Projector: A Modern Alternative to the Projector on Mirror Setup
Sometimes it might be hard to create a complex projector on mirror setup; fortunately, the advancements in projection solutions can help us solve our problems easily! Ultra Shot Throw (UST) projectors are a compelling alternative to classic projector on mirror setups. These projectors are especially advantageous for people who face spatial limitations, since UST projectors can deliver a large, vivid image from a very short distance! This feature makes them the perfect choice for small rooms.
UST projectors have the advantage of not being in need of complex alignment and space requirements of mirror-based systems. The image they project has a higher quality than projector on mirror setups, but need a higher budget. So, if you are looking to project high quality visuals in tight spaces, UST projectors are a valuable investment.
Advanced Techniques and Technologies
Utilizing a Projection Mapping Software
Using a projection mapping software such as “Resolume Arena” can be a game changer for your projector on mirror setup. This software gives you the ability of image alignment and correction for mirrored surfaces. So, if you seek accuracy and creative flair in your projection endeavors, it’s essential for you to utilize this software.
Projection mapping software can perfectly correct the distortions caused by the reflection off the mirror (Even with first surface mirrors you might get some distortions). It can create the most accurate visual for you by precise image alignment and correction of mirrored surfaces. Just note that while it’s an effective tool, it may not be that helpful with a classic mirror, so note that it is still important to have a first surface mirror.
Using Smart Glass Technology
Incorporating smart glass technology alongside your mirror is an advanced option. You can utilize the same space for both a mirror and a projection screen by employing smart glass, capable of changing from clear to opaque. While it requires some investment, the space-saving feature and WOW impact are amazing. This system was quite stunning when I witnessed it in a high-end house.
Pepper’s Ghost and Other Optical Illusions
If you’re looking to add a touch of flair you might find the Pepper’s Ghost method quite fascinating. It involves creating visual effects by projecting an image onto a glass surface, producing an incredible optical illusion. Although it’s a time-honored technique utilized in haunted houses and theaters, you can make some very captivating shows at home with contemporary projectors.
Integrating with Home Automation Systems
If you’re interested in smart home technology, you may increase convenience and control by connecting your projector-mirror arrangement to your home automation system. Consider having your projector come on automatically for movie night or responding to your voice commands. It’s all achievable with the correct setup, and it gives your home theater an added dose of style.
Utilizing Security Mirrors for Creative Projection
You can cleverly use security mirrors in your projector setup. This type of mirror which is usually found in stores for surveillance, can offer a unique way for projecting images due to its convex shape, it is especially useful in artistic or experimental contexts. This way a new dimension can be added to your projector on mirror setup.
The benefit that security mirrors offer lies in the way they spread and wrap images, something that isn’t possible with flat mirrors. This functionality makes security mirrors able to create intriguing visual effects. Although this type of mirror might not be suitable for every projection need, it may be helpful for people who tend to create innovative visual styles or a need to get a distorted, wide-angle projection to add to the artistic expression.
Conclusion
Exploring the art of projecting on a mirror has been both an inventive and educational experience. This method offers alternatives for organizing space and displaying graphics while enhancing the entertainment experience. Based on my experiences, I can attest that with just a touch of imagination, any space can be transformed into a stunning visual masterpiece using a projector on mirror setup.
FAQs
Is it Possible to Use Any Projector with a Mirror?
Absolutely! The key is to choose a projector that meets your specifications. When considering a projector, it’s essential to consider factors such as brightness, resolution, and contrast ratio. Additionally, ensure that the projector can reverse images, as this feature is necessary for mirror projections.
How Can I Make Sure Projecting an Image on a Mirror Does Not Cause It to Reverse?
The majority of contemporary projectors provide an option that lets you invert or flip the image. When utilizing a mirror, this is crucial since it guarantees that the picture will display on the screen appropriately. Usually, it’s a simple menu option toggle on the projector.
How Much Would Such a Configuration Cost?
Depending on the projector and mirror quality you choose, the price might vary significantly. First surface mirrors provide better picture quality than normal mirrors, although they are more costly. As for projectors, there are plenty of reasonably priced models out there that are suitable for mirror configurations. All things considered, it’s an expense, but one that can greatly improve your viewing experience.
