


It is essential to initiate TV calibration process to elevate your viewing pleasure, this becomes even more vital during the immersive movie nights or extended TV sessions. If you’ve encountered those vexing moments when your picture lacks precision, fret not! I am presenting a revolutionizing solution that’ll solve this issue. The nuances of calibrating your TV is what I’ll guide you through which is a process that I wholeheartedly endorse based on my firsthand experiences.
Understanding the Basics of TV Calibration
What is TV Calibration?
After the process of smart TV setup (or maybe a regular TV setup), it’s time for calibration; so what precisely is TV calibration then? To put it plainly, it’s the act of adjusting the TV’s settings to best meet a set of requirements for visual quality. To make sure the screen reproduces colors, brightness, contrast, and sharpness exactly as the filmmaker intended, it’s like giving your TV a customized makeover. It is especially essential for modern TVs with 4K resolution and HDR capabilities to make sure they reach their full potential.
Benefits of Calibrating Your TV
“Is TV calibration worth it?” is a core question that may be on your mind. Of course! You may greatly improve your watching experience by calibrating your TV. Black levels deepen, colors become more vivid and lifelike, and overall image clarity increases. Making the photo appear right is more important than making it seem good.
Understanding Picture Modes
The Impact of Different Picture Modes on TV calibration
The image mode is the first, and maybe most important, parameter to take into account while calibrating your TV. This particular arrangement has a significant impact on the overall image quality. Let’s dissect the prevalent modes:
- Standard Mode: For many TVs, this is the default mode. It is made to offer well-balanced image quality appropriate for the majority of viewing situations. However, it may not always provide the most accurate portrayal of color.
- Movie Mode or Cinema Mode: This mode is frequently used for calibration as it is designed with watching movies in mind. For a more cinematic experience, it usually provides warmer color temperatures and is calibrated closer to the standards used by filmmakers.
- Dynamic Mode: This setting, sometimes referred to as “Vivid mode”, increases color, contrast, and brightness to make the image “pop”. Although it works well in showrooms, it might be too much for home viewing and frequently results in less accurate color depiction.


Choosing the Right Mode
The visual option you choose will depend on your viewing preferences and surroundings. Movie mode is usually the best option for a more genuine and cinematic experience, especially in darker areas. The standard setting is appropriate for regular TV viewing in well-lit spaces. Although visually striking, dynamic mode may be too powerful for extended viewing and may not faithfully convey the director’s intentions.
Preparation for Calibration
Necessary Tools and Equipment
There are a few items you’ll need before you start calibrating. First and foremost, you need a trustworthy calibration disc, this disc should include a variety of test patterns for comprehensive calibration such as the Spears & Munsil HD Benchmark. I’ve tried it, and it gets the job done. To play the disk, make sure you have a current game console or Blu-ray player.
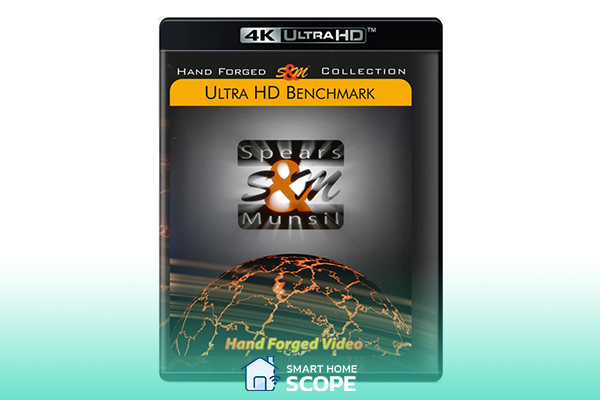
The Calibration disk is like an essential guide in the symphony of the TV calibration. Color, brightness, and contrast settings are harmonized by this disk to reach a perfect display, transforming the TV into a faithful rendition of the creator’s vision, meaning that it’s an essential too for people who wish to have a cinema-like experience in their home.
Setting the Right Environment
Adjusting settings is only one aspect of calibration; the lightning in your space is as important. I like to calibrate in a place with low lighting since it’s more like the place in which I generally watch TV in. This contributes to getting more precise results.
Adjusting Backlight and OLED Light
Understanding Backlight in LED TVs
The visual quality of LED TVs is greatly influenced by the backlight setting. It regulates the screen’s overall brightness. Here’s how you can change it
- In Bright Rooms: Increase the backlight. This makes the image stand out against the surrounding light better. But too high of a setting might result in washed-out pictures.
- In Dark Rooms: Dim the backlight. A lower setting creates a more cinematic experience by deepening blacks and lowering eye strain.
OLED Light Setting in OLED TVs
OLED TVs lack conventional backlights. Rather, every pixel produces its light. The brightness of these pixels is adjusted using the ‘OLED Light’ option.
- Balancing Brightness: OLEDs can attain absolute black, unlike LED TVs; therefore, decreasing the light doesn’t always increase the black levels. To ensure pleasant viewing and avoid problems with picture retention, brightness must be balanced.
- Room Environment Consideration: A greater OLED Light setting can be required in rooms with more light. A lower level is frequently more comfortable in dim conditions while still offering great visual quality.
Step-by-Step Calibration Process
Finding the Best Picture Mode
Choosing the appropriate photo mode is the first step in the process. A lot of TVs have many presets, but the most accurate place to start with calibration is usually in the ‘Movie’ or ‘Cinema’ mode. I picked up on this advice early on, and it helps.
Adjusting Color Temperature
Color temperature is the next topic. It is important to note that the color temperature also influence your TV’s color gamut (the spectrum of colors your TV can display).
In most cases, color temperature may be set to ‘Warm’ to get the colors closer to what the filmmakers desire. Give it a try even though it could seem strange at first, especially if you’re used to colder, bluer tones. You come to appreciate the warm setting’s naturalness.
Disabling Unnecessary Picture Features
This is an important section. Disable any features that reduce noise or smooth out movements (motion smoothing features). These frequently cause more damage than good to the quality of your image and might impede the calibrating process. I had to learn this the hard way, but as soon as I switched them off, things started to get better.
Fine-Tuning Sharpness
Understanding the Sharpness Setting
Sharpness in TV environments is frequently misinterpreted. Although the purpose of the modification is to improve image clarity, making a mistake might result in unnatural image quality.
- Over-Sharpening Issues: Excessive sharpness can distort a picture by producing halo effects surrounding objects. It can make photographs appear less naturally soft and accentuate noise.
- Finding the Right Balance: To obtain a sharp image while maintaining its organic appearance is the aim. The ideal setting is frequently lower than you may think.
Adjusting Sharpness
Here’s how to successfully change the sharpness setting:
- Start Low: Start with a sharpness level that is less than the default. A lot of TVs have an excessively high sharpness setting by default.
- Use a Reference Image: Present a crisp, detailed image. Reduce the sharpness by a small amount after gradually increasing it until you start to see strange edges or halo effects.
- Brand-Specific Settings: Note that different brands may have different sharpness scales. On one TV, a setting of 20 can be the same as 50 on another.
Also Read:
Samsung KS8500 Calibration Settings
Color and Tint Adjustments
Adjusting Color Saturation
Your TV’s color settings control how vibrant and intense the colors are. Here’s how to tweak this setting:
- Start with a Natural Look: First, adjust your color so that the hues appear natural. When colors are oversaturated, they appear unnatural, and when they are undersaturated, the image loses its vitality.
- Use Color Test Patterns: Color bars are frequently found on calibration discs or downloaded test patterns. Once the bars are distinct and seem true to the intended hue, adjust the color setting.
Fine-Tuning Tint (Hue)
The goal of tint or hue modifications is to bring the image’s red and green to balance. Despite its small size, this choice has a significant impact on the overall color and tone of the skin.
- Using a Blue Filter: Many calibration kits include a blue filter that helps separate the blue tones, which makes it simpler to balance the reds and greens.
- Adjusting Tint: Turn on the blue filter and play with the tint setting until the intensity of the blue bars in the test pattern matches. This ensures a proper balance of reds and greens.
Checking and Adjusting Picture Geometry
It is crucial to check that the aspect ratio on your TV is proper. Look on your TV menu for settings like “Aspect Ratio” or “Picture Size” and select “Normal” or “Just Scan.” This makes sure the picture isn’t distorted or stretched too much.
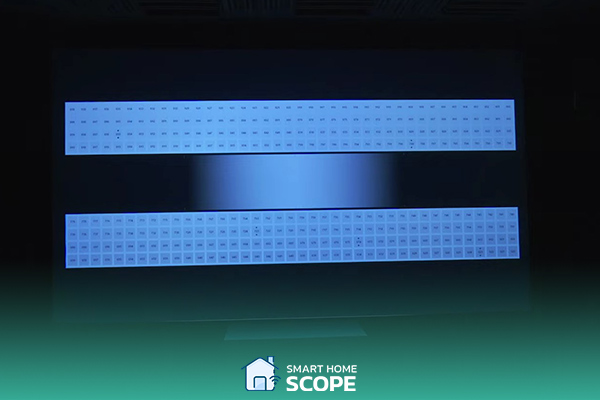
Furthermore, the Spears & Munsil calibration disc offers a useful method for evaluating and modifying the image geometry on your TV. This is how you do it:
- Accessing the Geometry Test Pattern: Go to the ‘Advanced Video’ area of your player after inserting the Spears & Munsil disk. Proceed to choose ‘Setup’ and then ‘Framing.’
- Interpreting the Test Pattern: The limits of different resolutions will be visible in the test pattern that is shown. For example, the white arrows pointing at the 1920 x 1080 lines should touch the edge of your screen if you’re playing a normal Blu-ray disc on a 1080p TV. The arrows pointing to the 3840 by 2160 lines on the Ultra HD Blu-ray edition will line up with the edge of the screen if you’re watching it on a 4K TV.
- Adjusting Your TV Settings: You may need to change the TV’s aspect ratio or image size settings if the test pattern isn’t perfectly aligned with the boundaries of your screen. Within the visual settings menu on your TV, look for choices like ‘Aspect Ratio,’ ‘Visual Size,’ or ‘Zoom.’ To see the information in its original resolution without any changes, set it to ‘Normal’ or ‘Just Scan.’
Setting Contrast
Locating and Using the Contrast Setting on the Calibration Disc
To use the Spears & Munsil disc to change the contrast, go to the ‘Video Setup’ section and choose ‘Contrast.’ This will display the test charts for PLUGE. Change the contrast setting on your TV until the numbered bars below 238 are distinct shades of gray and the numbered bars above 238 are white.
The gradient in the middle should seamlessly transition from a white band in the center to black on the edges, and the 10 colored squares at the top and bottom of the screen should be surrounded by gray boxes. By doing this, you can be sure that your TV will show the whole gamut of grays and whites, preserving detail in the brightest areas of the picture.
Technical Tips for Contrast Adjustment
It’s crucial to keep contrast from being set too high because this might make whites bleed into one another, reducing sharpness in bright settings. On the other hand, if it is adjusted too low, the image may seem lifeless. Finding a level where the image’s brightest areas are distinct and detailed without dominating the remainder of the image is crucial. It is crucial to create an energetic image maintaining an equilibrium.
Setting Brightness
Finding and Adjusting Brightness on the Calibration Disc
Visit the ‘Brightness’ test pattern included in the ‘Video Calibration’ section of the Spears & Munsil disk to adjust brightness. Start by turning up the TV’s brightness until all four of the gray bars in the center of the pattern are visible. After that, progressively lower the brightness such that the two left bars disappear into the background and just the two right bars are visible. This process aids in level determination, resulting in deep and detailed blacks without losing shadow areas.
Technical Insights for Brightness Adjustment
It’s critical to realize that your image’s brightness setting affects how dark the black levels are. Achieving deep, genuine blacks while keeping the details in the dark portions of the image is the aim. This setting is very important in situations with more darkness where an incorrect adjustment may result in a loss of detail. The optimal balance will improve the viewing experience overall by enabling you to see minute details even in the darkest areas of the picture.
Also Read:
Vizio M70-C3 Calibration
Maintaining Calibrated Settings
How to Preserve Your Settings
It’s crucial to keep your TV’s calibration settings after you’ve achieved it. Whenever a firmware update modifies the TV’s settings, I usually take note of them in case I have to reset it. It’s also possible to lock in these settings on some TVs, which is useful.
When to Recalibrate
Over time, TVs may deviate from their calibrated settings. Every few months, I generally examine mine, especially if I see a decline in the quality of the pictures. Recalibrating is also a good idea if you relocate your TV to a room with a different lighting setup.
Troubleshooting Common Calibration Issues
Addressing Common Problems
Problems can still occur even with meticulous calibration. Please check your settings if the colors don’t seem correct or if the image is too bright or too dark. Sometimes these problems can be fixed with only a small adjustment.
Tips for Optimal Viewing Experience
Recall that there is considerable subjectivity involved in calibrating. My opinion of what looks excellent could not be what you desire. Don’t be scared to modify the parameters to fit your preferences. Additionally, keep in mind where your information came from; various media and devices might have an impact on visual quality.
Settings glossary for TV brands
| Setting | Samsung | Sony | Vizio | LG | TCL | Hisense |
| Picture Mode | Picture Mode | Picture Mode | Picture Mode | Picture Mode | Picture Mode | Picture Mode |
| Backlight | Backlight | Brightness | Backlight | Backlight (OLED Light for OLED TVs) | TV Brightness & Backlight | Backlight |
| Brightness | Brightness | Black Level | Brightness | Brightness | Brightness | Brightness |
| Contrast | Contrast | Contrast | Contrast | Contrast | Contrast | Contrast |
| Sharpness | Sharpness | Sharpness | Sharpness | Sharpness | Sharpness | Sharpness |
| Color | Color | Color | Color | Color | Color | Color |
| Tint | Tint (G/R) | Hue | Tint | Tint | Tint | Tint |
| White Balance & Color Space | White Balance/Color Space | Adv. Color Temperature | Color Tuner | White Balance / Color Management System | Expert Picture Settings (App Only) | Color Tuner, White Balance |
| Color Temperature | Color Tone | Color Temperature | Color Temperature | Color Temperature | Color Temperature | Color Temperature |
| Full/Limited RGB | HDMI Black Level | HDMI Video Range | (Automatic) | Black Level | (Automatic) | (Automatic) |
| Dynamic Contrast | Contrast Enhancer | Adv. Contrast Enhancer | Black Detail | Dynamic Contrast | Dynamic Contrast | Active Contrast |
| Local Dimming | Local Dimming | Auto Local Dimming | Active Full Array | LED Local Dimming | Local Contrast | Local Dimming |
| Motion Interpolation | Auto Motion Plus | Motion-flow | Motion Control | Tru-Motion | Action Smoothing | Motion Enhancement |
| Noise Removal | Digital Clean View | Random Noise Reduction, Digital Noise Reduction | Reduce Noise | MPEG Noise Reduction | Noise Reduction | Noise Reduction, Digital Noise Reduction |
| Black Frame Insertion | LED Clear Motion | Clearness | Clear Action | Motion Pro (OLED Motion for OLED TVs) | LED Motion Clarity | Motion Clearness |
| Full Bandwidth | Input Signal Plus | HDMI Signal Format | Full UHD Color | Ultra HD Deep Color | HDMI Mode | HDMI 2.0 Format |
TV Calibration Technologies: What to Expect in 2024?
Focus on AI & Sports
The realm of TV calibration is going towards a big transformation, ushered in by AI advancements. AI will be in charge of automatically adjusting picture settings to enhance the vibrancy and clarity of the picture, particularly for dynamic sports content; some brands that are working on this technology are TCL and Hisense. A new era of efficiency and user-friendliness is will be heralded by this evolution in how we calibrate TVs, it will be a shift towards automated and responsive tuning for optimal viewing experiences.
Conclusion
The TV calibration process is a cherished rite for enthusiasts who love home entertainment deeply. The difference in viewing experience that is made by TV color calibration is like a shift from day to night. I assure you from my personal experience that the result you get after the process of calibrating TV is worth it. So, now that you know how to calibrate a TV, prepare all of the tools and engage in the process.

")
")
")
; Here’s All you Need to Know!")
